Dry creek bed designs have become a favorite among homeowners looking to solve drainage issues while enhancing the beauty of their yards. Not only do they guide rainwater naturally, but they also serve as eye-catching features that bring structure and flow to any landscape. Whether you’re working with a sloped garden, a bare patch, or a soggy corner that never seems to dry, a well-crafted dry creek bed can make all the difference.
With the right combination of rocks, plants, and thoughtful design, you can turn a drainage solution into a stunning garden feature. From curvy riverstone paths to integrated water features and native plant borders, these DIY dry creek bed ideas offer something for every style and skill level. This article covers 19 creative ways to bring beauty, functionality, and year-round interest to your yard using nothing more than rocks, plants, and a bit of imagination.
Table of Contents
1. Natural Riverstone Warning
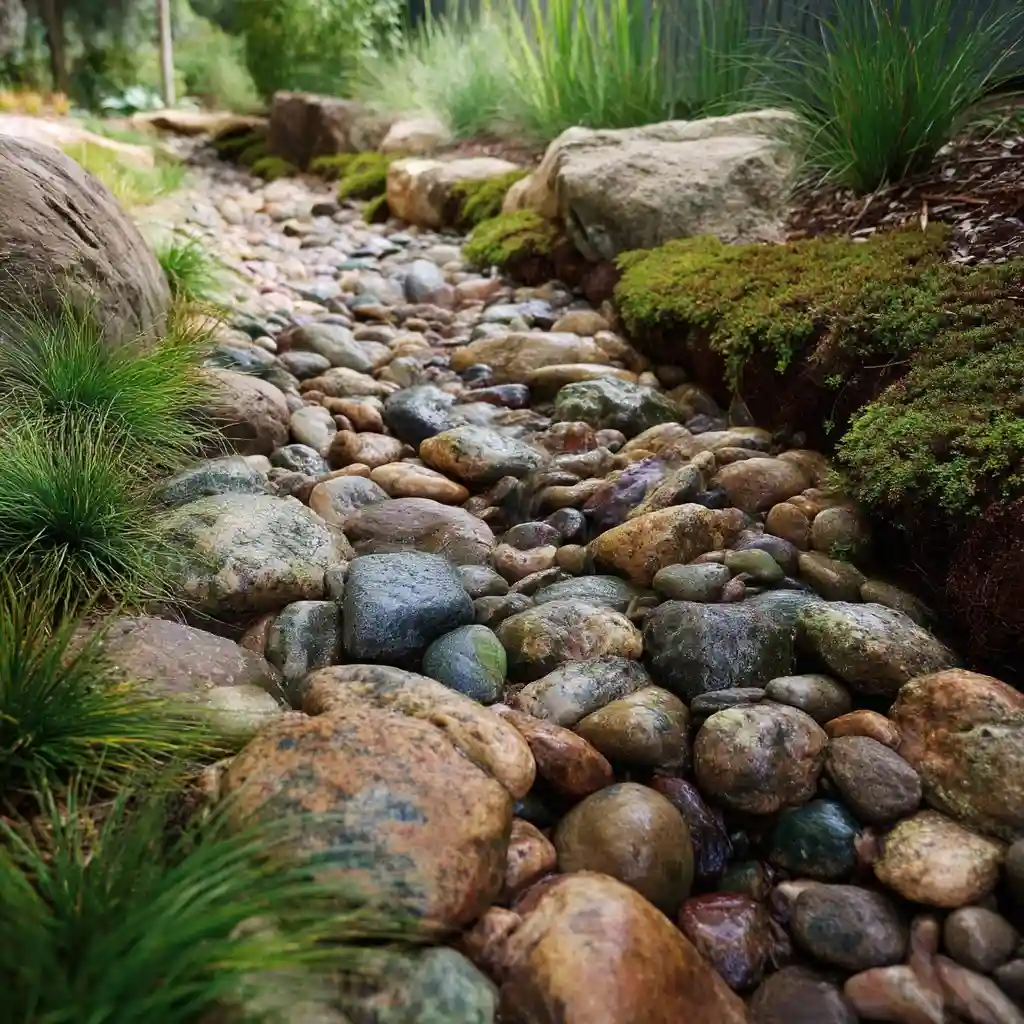
Using natural riverstone is one of the most authentic ways to start your dry creek bed project, but it comes with important considerations. Riverstones, especially when sourced locally, offer a rustic and organic look that blends seamlessly with the surrounding landscape. Their smooth, rounded texture mimics natural waterways and enhances the visual flow of your yard.
However, before hauling in a truckload of rocks, it’s essential to evaluate your drainage slope. Without a proper gradient, water may pool or back up instead of flowing through the creek bed. A gentle downward slope—around 2%—is ideal to ensure water moves efficiently and avoids erosion.
Pro Tips:
- Layer in a weed barrier fabric beneath your stones to reduce maintenance and keep your bed looking clean.
- Combine riverstones of various sizes for depth and texture: large boulders as anchors, medium rocks for structure, and fine gravel to fill gaps.
- Choose native plants along the creek edges for erosion control and added color.
Lastly, keep aesthetics in mind. Mixing stone colors—grays, browns, and whites—creates a more natural, dimensional look than uniform shades. A garden trowel and sturdy gloves will make setup easier, and using stone adhesive on larger rocks can keep them from shifting in heavy rain.
2. Curvy Creek Design
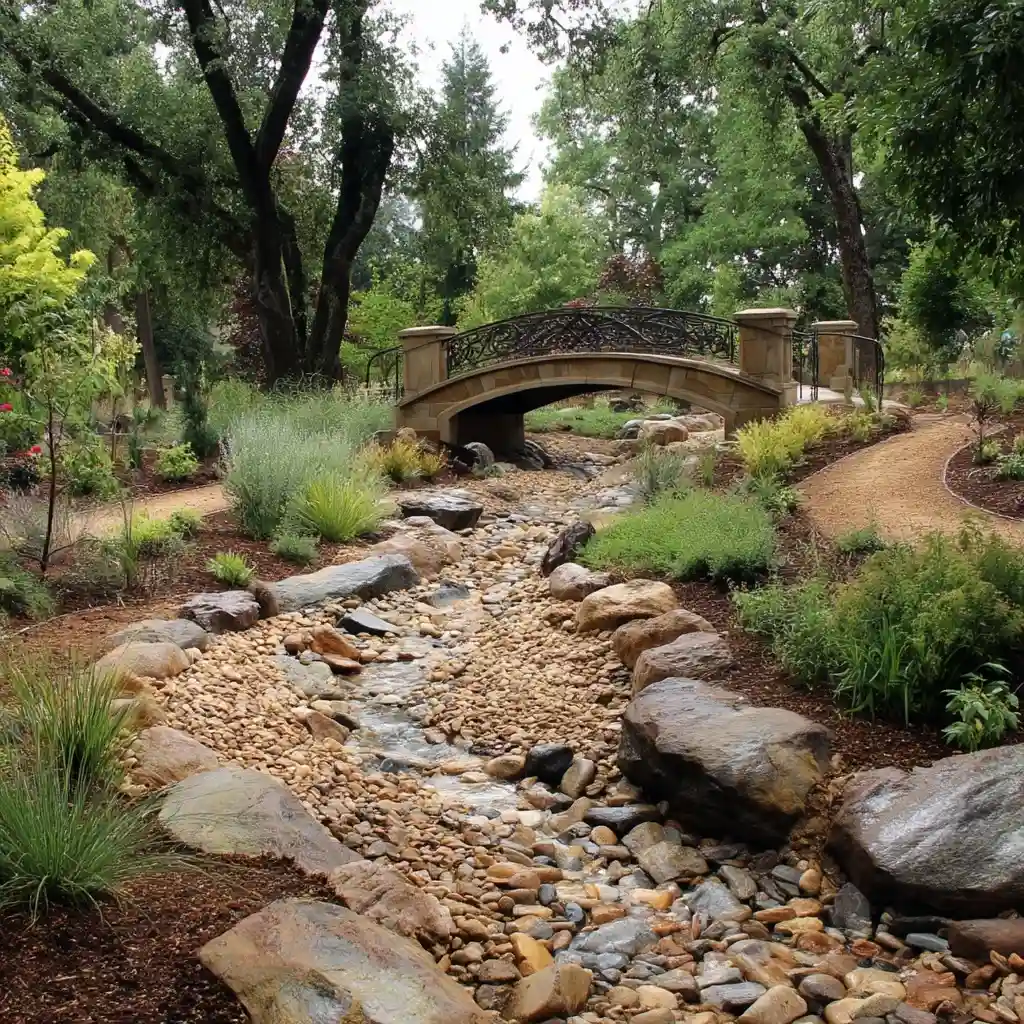
A straight line might be easier to dig, but adding curves to your dry creek bed gives it a more natural, flowing appearance. In nature, water rarely follows a rigid path—so by mimicking its organic movement, you create a more dynamic and visually appealing feature in your yard.
Before digging, use a flexible garden hose or rope to sketch out the desired path. This lets you adjust the shape until it feels just right. Soft, sweeping curves help guide the eye and make even small spaces appear larger and more inviting.
When building your curvy design, remember these essentials:
- Place larger rocks at bends to help with water redirection and prevent erosion.
- Mix in small pebbles and decorative gravel for texture and drainage.
- Consider planting grasses or wildflowers along the edges to soften the look and encourage pollinators.
You can also install a small footbridge over a tighter bend, which doubles as a focal point and functional access path.
Tip: Vary your rock colors and sizes to enhance realism. And always plan your curves to align with your yard’s natural drainage direction—this isn’t just for looks, it’s for effective water management too.
3. Rock and Plant Combo
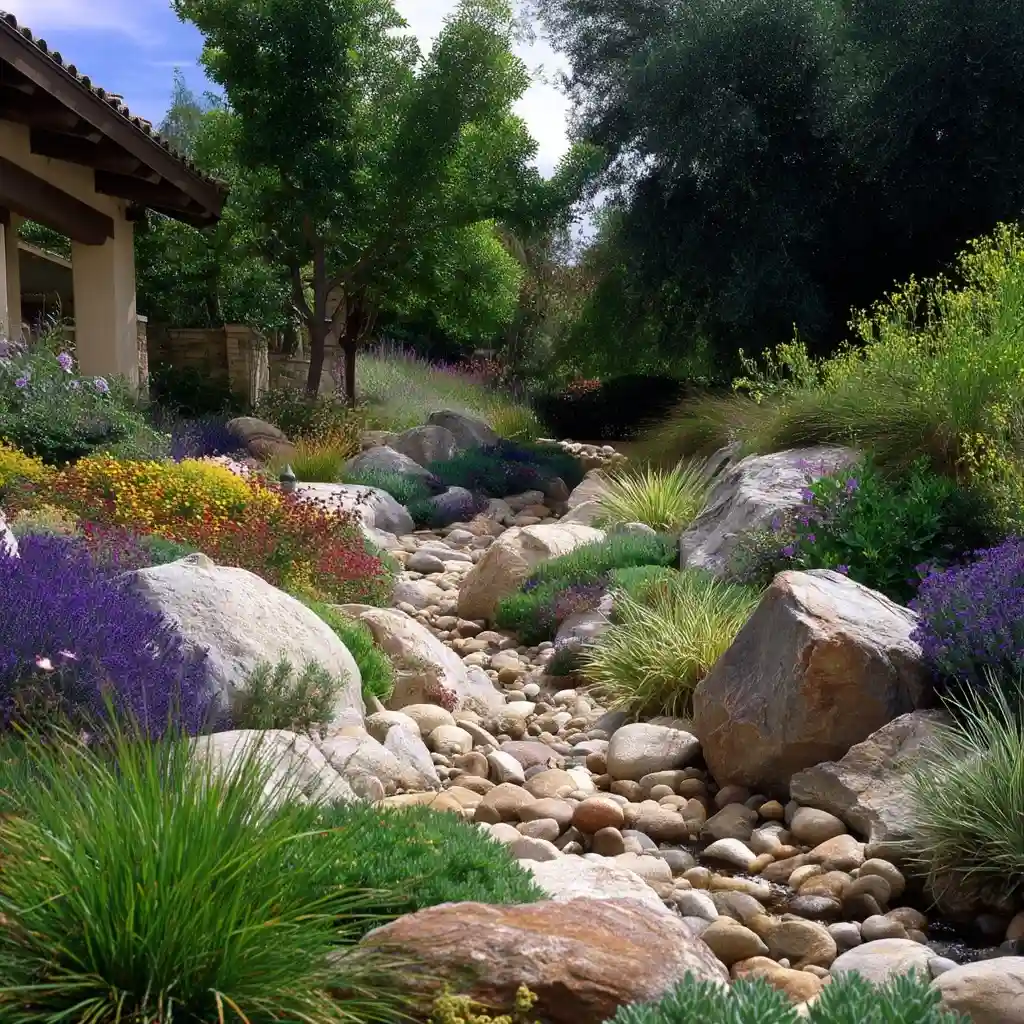
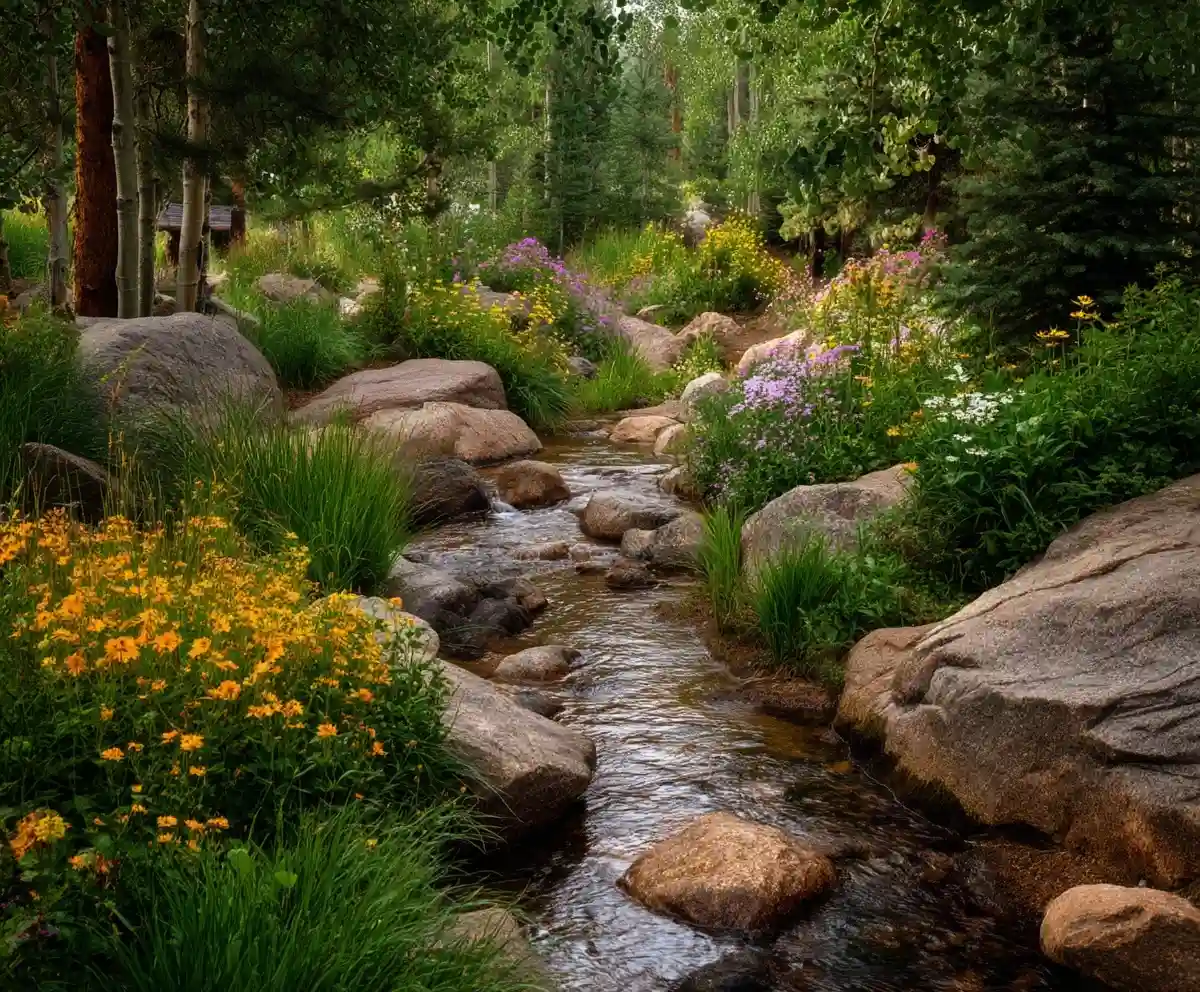
Combining rocks with plants adds life, texture, and contrast to any dry creek bed, turning a simple drainage feature into a lush, thriving garden centerpiece. Rocks provide structure and water redirection, while plants introduce movement, seasonal color, and a softening touch that elevates the whole design.
Start by choosing plants that thrive in your climate and can tolerate dry conditions. Drought-tolerant varieties like sedum, ornamental grasses, yarrow, and lavender not only reduce water use but also require minimal upkeep. For visual balance, plant taller species in the background and tuck in groundcovers between stones.
How to create the perfect rock and plant balance:
- Use larger boulders as anchor points or focal elements.
- Surround them with low-growing greenery to create a layered effect.
- Allow space between plantings for rainwater to flow freely.
Enhance nighttime beauty by adding low-voltage garden lighting tucked between rocks or around plant clusters. This will highlight the textures and keep the feature visible and safe after sunset.
Bonus Tip: For better root development in rocky soil, work in organic compost or soil amendments during planting. And don’t forget a garden trowel for precision when placing your plants in tight spots.
4. Multi-Level Creek Bed
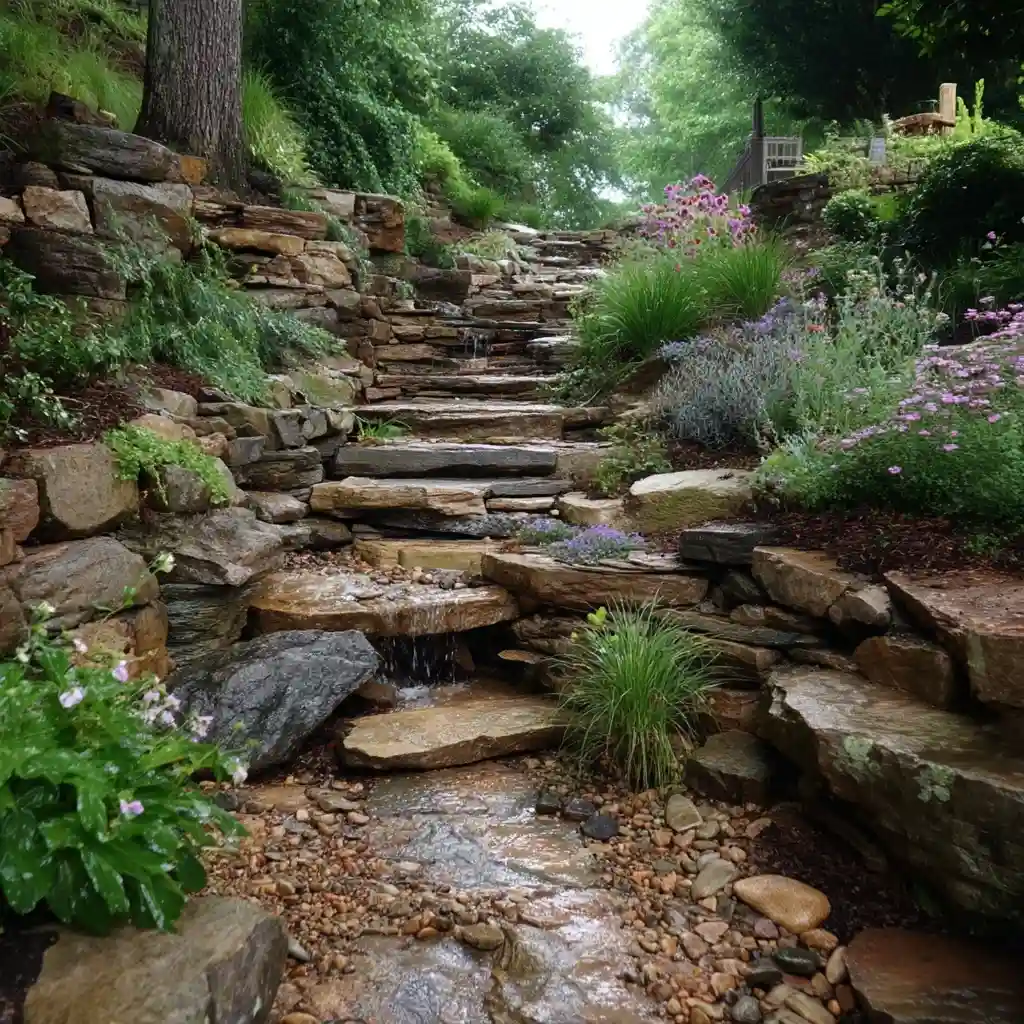
Adding elevation changes to your dry creek bed introduces visual interest and improves water control, especially in sloped or uneven yards. A multi-level design allows water to travel naturally from one level to the next while creating distinct planting zones and dramatic stone arrangements.
Think of each level as a mini garden terrace. You can define these sections using retaining stones, stacked boulders, or even wooden borders. This layered approach helps slow water flow, reducing erosion and giving your landscape a tiered, sculpted look.
Smart multi-level tips:
- Use larger stones at the base for stability, with medium and small rocks on the higher tiers.
- Install landscape fabric between levels to prevent weeds and maintain drainage.
- Add mini waterfalls or spillways with small pumps if you’re including a water feature.
Plants play an important role in these tiered beds. Choose taller varieties like switchgrass or Russian sage for higher levels, and spreading groundcovers like creeping thyme or ice plant for the lower areas.
This setup is not only functional—it’s a beautiful way to display a variety of textures, shapes, and colors while managing water runoff efficiently.
5. Eco-Friendly Creek Bed
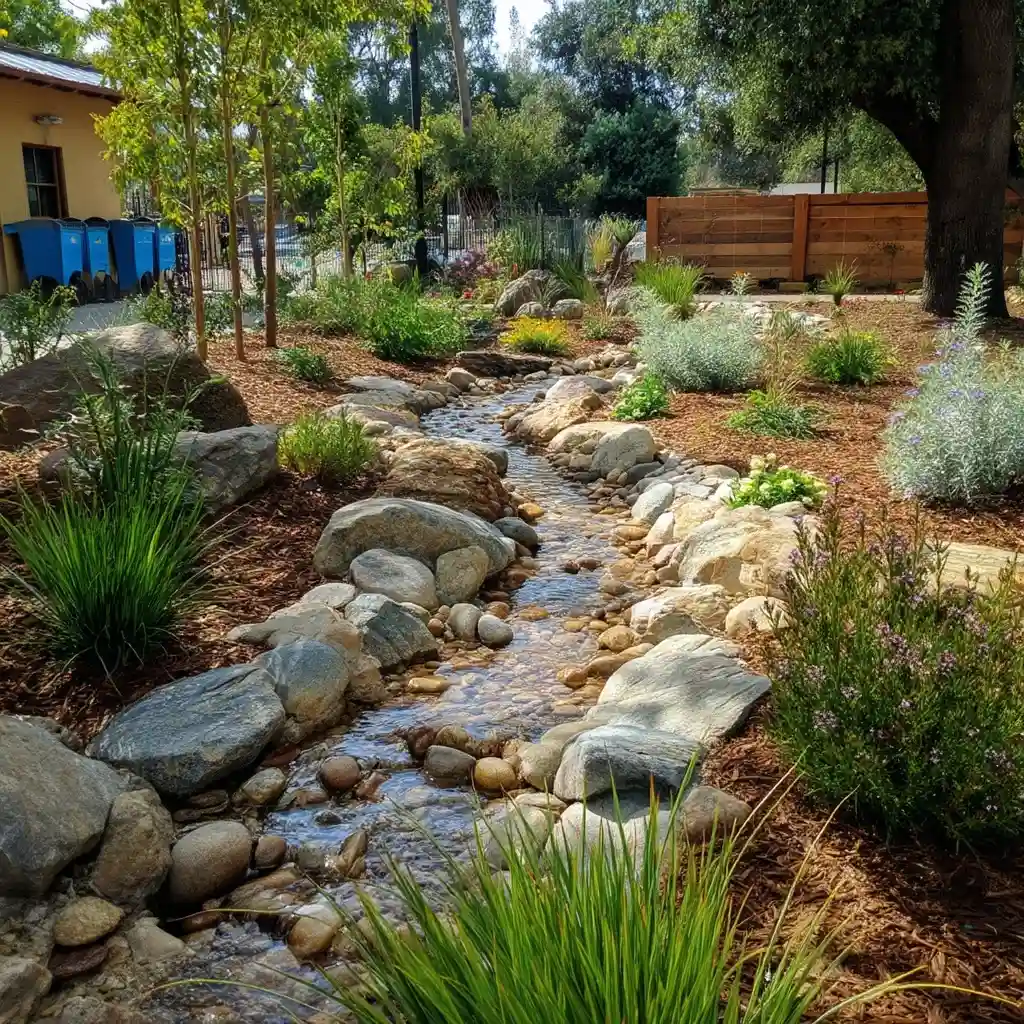
Designing an eco-friendly dry creek bed not only helps manage water runoff, but also supports local ecosystems and reduces your environmental footprint. By choosing sustainable materials and native plants, you can create a low-maintenance feature that’s both beautiful and beneficial to the planet.
Start with reclaimed or salvaged stones—think leftover bricks, broken concrete, or old pavers. These materials not only save money but also keep waste out of landfills. Pair them with locally sourced gravel to minimize transportation impact and blend better with your region’s landscape.
Eco-conscious additions:
- Use native plants that require less water and are more resistant to pests.
- Avoid synthetic herbicides or fertilizers—opt for compost and natural mulch instead.
- Allow room for insects, birds, and beneficial pollinators by planting species like milkweed, coneflower, or goldenrod.
Add texture and habitat value by incorporating fallen logs, driftwood, or flat stones where small animals can hide or sun themselves. These simple touches help your creek bed function as a mini wildlife refuge.
Finally, when building, always consider permeability. Leave space between stones for water to soak in and recharge groundwater, reducing stormwater runoff and erosion.
6. Decorative Edging
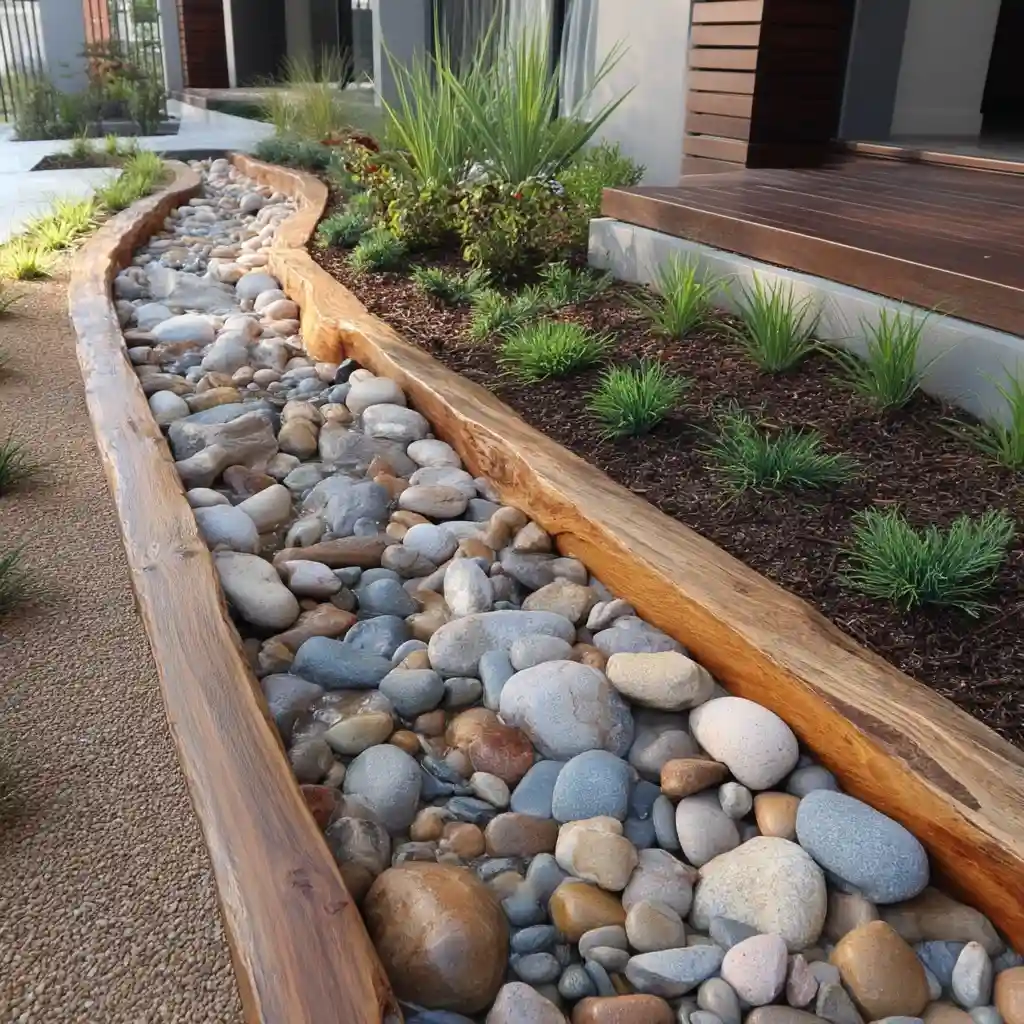
Well-defined borders can transform a dry creek bed from a simple channel into a polished landscape feature. Decorative edging not only adds visual appeal but also serves a practical purpose: it keeps rocks, gravel, and mulch neatly contained while helping to guide water flow.
You’ve got several stylish and functional options when it comes to edging:
- Timber planks for a rustic, natural look
- Metal strips for a sleek, modern touch
- Stacked stones or bricks to echo the creek bed’s materials
- Living edges using ornamental grasses or dense groundcovers
No matter your choice, ensure the edging is slightly raised to keep materials in place without blocking drainage. Combine textures—like smooth gravel next to rough-hewn wood or flagstone—for added interest.
Installation tips:
- Use landscape adhesive to stabilize stone or brick edging.
- A rubber mallet helps position materials without cracking them.
- Add drainage breaks every few feet in rigid edging to prevent pooling.
A thoughtfully edged dry creek bed looks tidy and purposeful, creating clean visual lines that contrast beautifully with the organic flow of stones and plants. Plus, edging helps reduce long-term maintenance by keeping invasive grass and weeds at bay.
7. Water Feature Integration
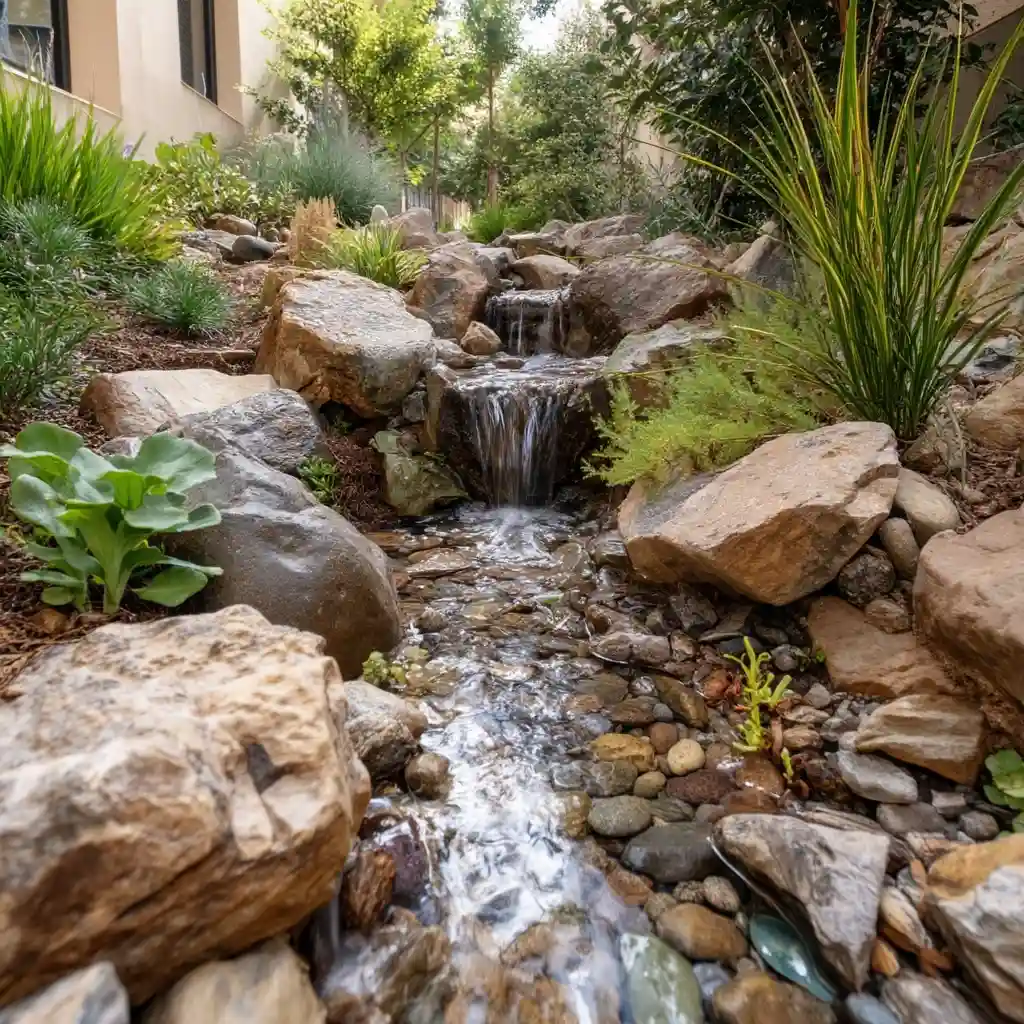
While a dry creek bed is typically designed to stay dry most of the time, adding a water feature brings motion, sound, and a sense of tranquility to your garden. With just a small investment, you can turn a functional drainage solution into a focal point that feels like a natural stream.
Consider installing a fountain, small pond, or recirculating stream at the upper end of your creek bed. When it rains, the natural runoff can join the man-made flow, enhancing both form and function.
Best practices for integrating water features:
- Position the pump or fountain at the highest point for natural downhill flow.
- Use aquatic plants or wetland grasses around the water zone to create a seamless transition.
- Place flat stones where water trickles down to mimic miniature waterfalls.
- Add a pond liner beneath the main stream path to retain water, if desired.
The sound of running water not only masks street noise but also attracts birds and pollinators to your yard. Don’t forget to include solar-powered lighting or submersible LED lights to create a magical glow after dark.
With proper planning, your dry creek bed can switch effortlessly between dry elegance and flowing serenity—offering year-round beauty and versatility.
8. Seasonal Color Changes
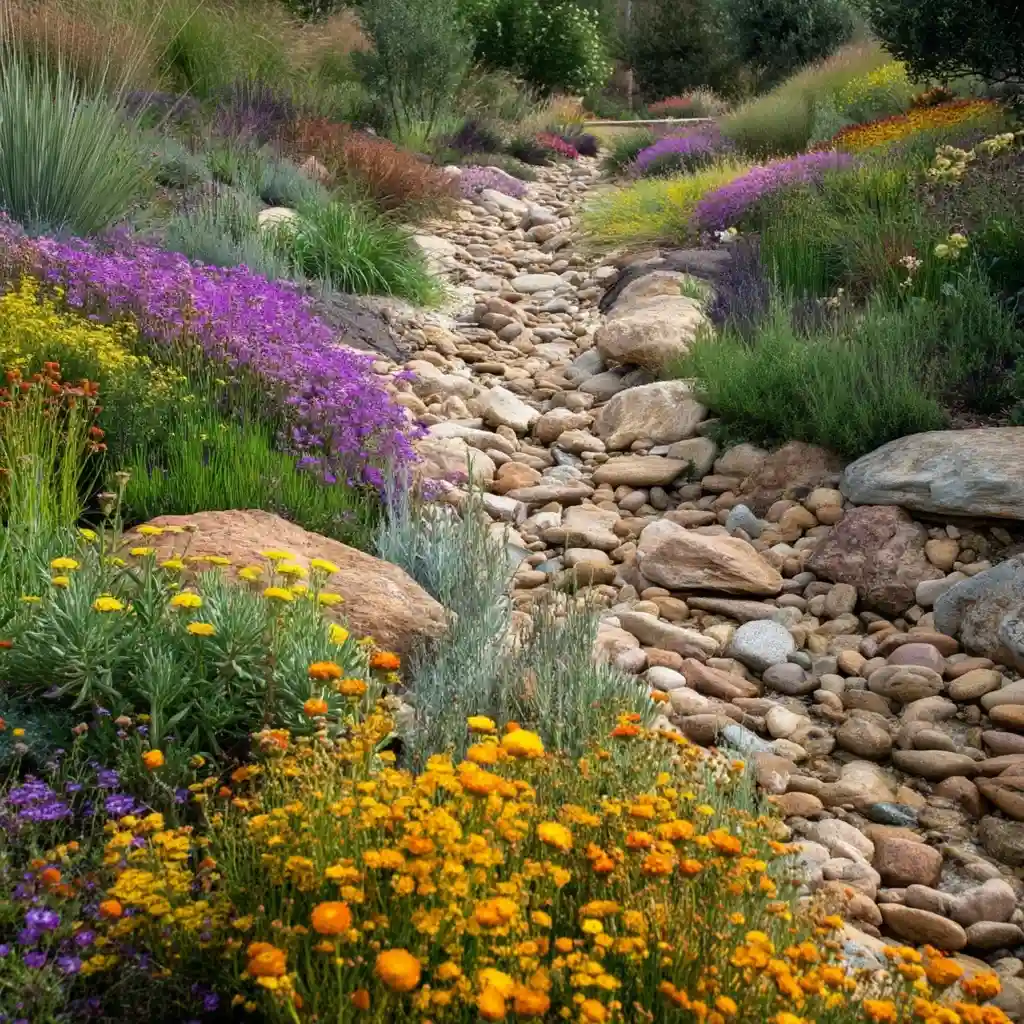
A thoughtfully planted dry creek bed can transform with the seasons, offering fresh colors and textures throughout the year. Instead of a static stone feature, you’ll have a living landscape that evolves month by month—keeping your yard vibrant and engaging.
Choose perennials and native plants that bloom in different seasons to keep things interesting:
- Spring: Tulips, daffodils, or creeping phlox for early color
- Summer: Coneflowers, daylilies, and salvia for height and bold hues
- Autumn: Asters, ornamental grasses, and goldenrod for warm tones
- Winter: Evergreens and red-twig dogwood for structure and contrast
Plant these in clusters along the edges of your creek bed to mimic how vegetation naturally grows near a stream. Layering taller plants in the back and shorter varieties in front will create a sense of depth and balance.
Tips for year-round visual appeal:
- Use mulch or gravel between plantings to define spaces and retain moisture.
- Add seasonal garden decor, like pumpkins in fall or lanterns in winter, to enhance the atmosphere.
- Incorporate a few evergreens for consistent greenery and winter interest.
Maintaining seasonal interest in your dry creek bed not only improves curb appeal—it also encourages more frequent visits from pollinators, birds, and even neighbors who admire your ever-changing landscape.
9. Minimalist Approach
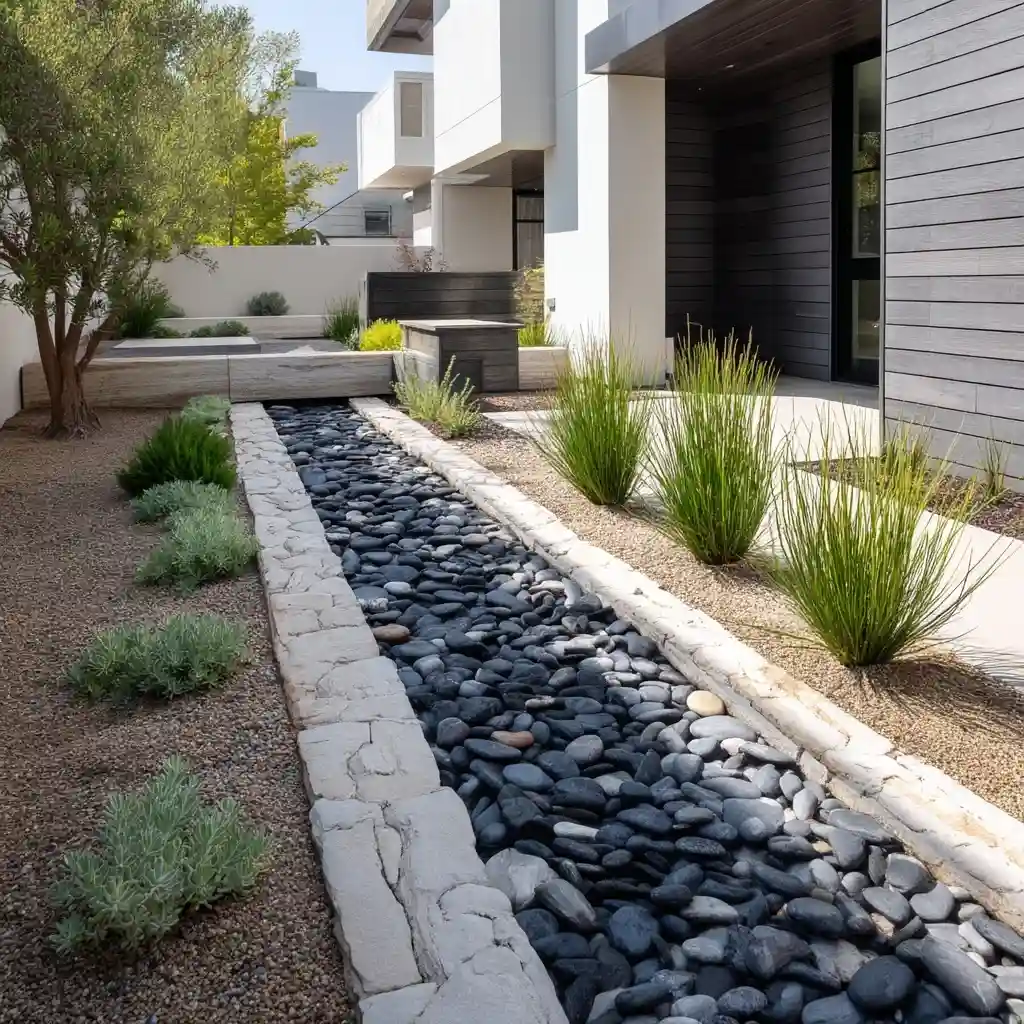
If you’re drawn to clean lines and low-maintenance design, a minimalist dry creek bed might be your ideal fit. This style focuses on simplicity—using fewer elements with purpose and precision to create a calm, uncluttered look that still enhances yard drainage.
The foundation of this design is thoughtful restraint:
- Stick with a limited color palette—white, gray, or tan stones work beautifully.
- Use one or two types of rock in varying sizes for subtle texture.
- Select just a few well-placed native plants with sculptural shapes, like blue fescue, agave, or dwarf evergreens.
Spacing and symmetry matter here. Leave open space between rocks and plants to highlight their form and prevent visual overload. Edges should be crisp, and transitions between gravel and lawn or mulch should be clearly defined—use metal or stone edging to keep it neat.
Pro Tips for Minimalist Design:
- Use larger feature stones as focal points rather than lots of smaller accents.
- Keep plantings low and tidy to reinforce the sense of order.
- Regularly rake gravel to maintain smooth lines and remove debris.
This clean, architectural look works especially well in modern homes or as a contrast to more lush, naturalistic garden areas elsewhere in your landscape.
10. Artistic Accent Pieces
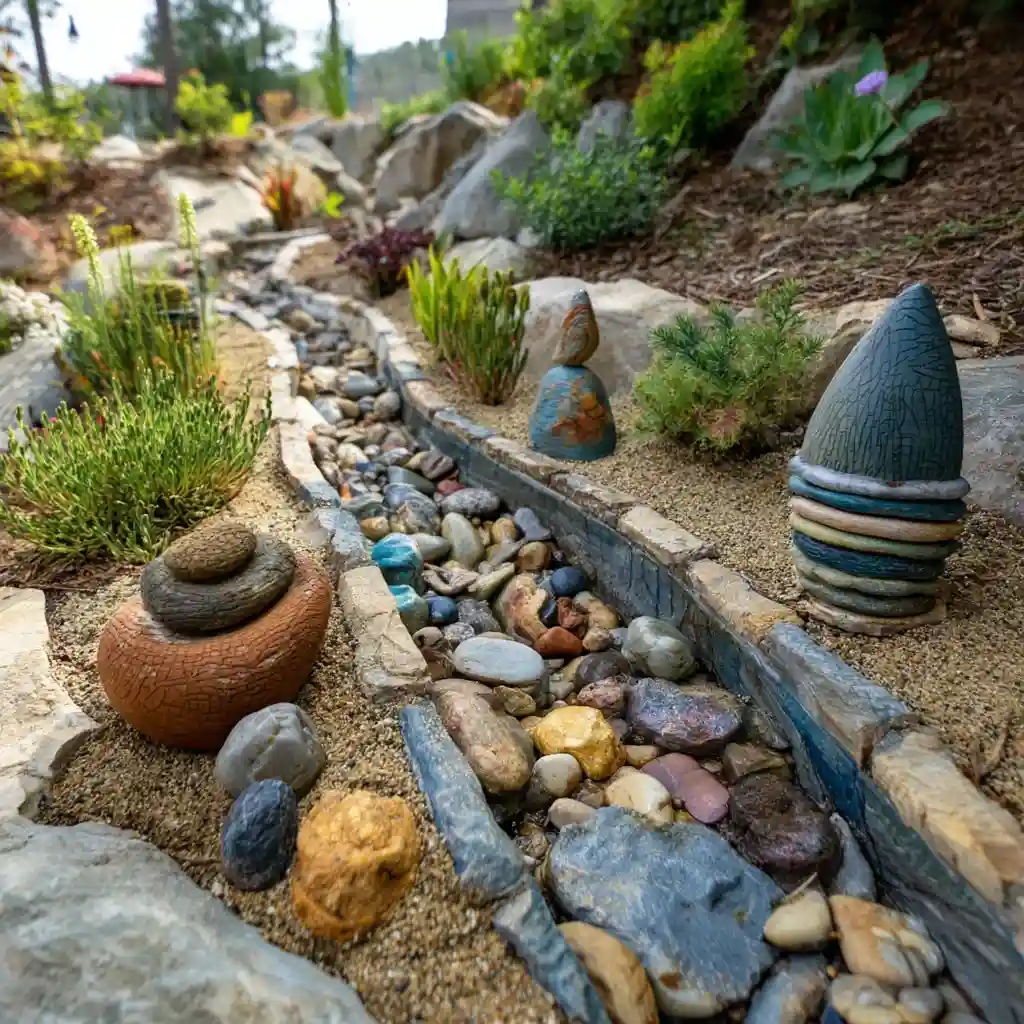
Adding a personal touch to your dry creek bed can turn it into a true backyard showpiece. Artistic accent pieces—whether subtle or bold—offer an opportunity to express your creativity and elevate the entire design.
Start by choosing weather-resistant garden art that complements your yard’s overall style. Sculptures, abstract metalwork, mosaic tiles, or even decorative birdhouses can all find a home in or around your dry creek bed.
Placement matters:
- Tuck small statues or ceramic orbs between rocks for surprise visual interest.
- Use driftwood, reclaimed metal, or stone carvings to maintain a natural aesthetic.
- Hang wind chimes nearby to add soft movement and sound.
Stick to one or two statement pieces in a smaller bed, or scatter a handful of coordinated accents throughout a longer design. The goal is to add personality without overpowering the natural elements.
Tips for artistic integration:
- Choose a consistent color theme to tie your accents together.
- Use outdoor adhesive or anchor stakes to secure heavier items in place.
- If you rotate seasonal decor, make sure your pieces are easy to remove or swap.
These accents do more than just add flair—they invite interaction, spark conversation, and help your landscape feel uniquely yours.
11. Floating Stones Effect
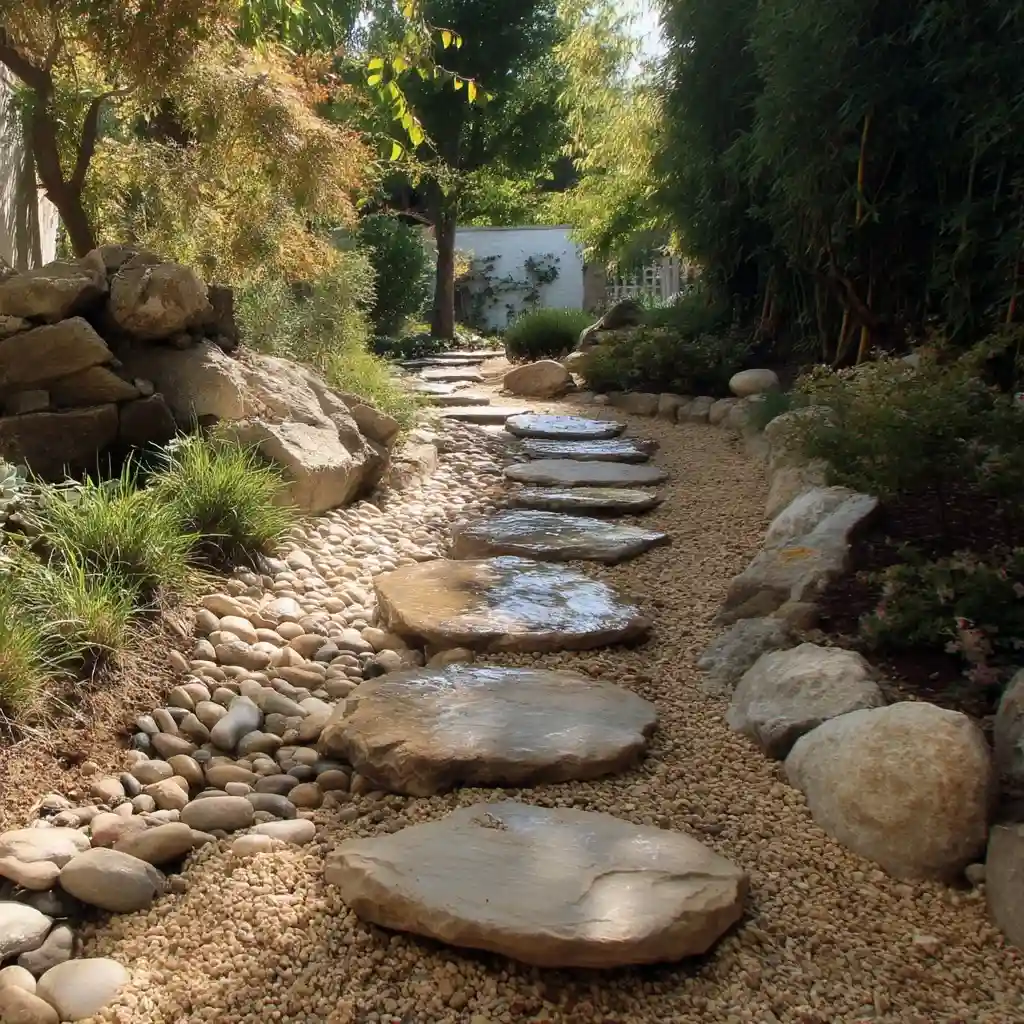
For a design that wows on first glance, try creating a floating stones effect in your dry creek bed. This optical illusion gives the appearance that large rocks are hovering just above the ground—adding visual intrigue and a contemporary twist to a classic landscape feature.
The effect is achieved by carefully positioning large flat stones atop smaller, darker gravel or ground cover that blends into the background. The contrast makes the big stones look suspended, even though they’re firmly supported underneath.
Steps to create the floating look:
- Lay a base of dark-colored gravel or decomposed granite.
- Nestle larger flat stones slightly above the surface by propping them up with hidden supports—like smaller rocks or concrete blocks buried beneath.
- Maintain consistent spacing and height to keep the illusion believable.
This style works best in modern or minimalist landscapes, where simplicity and bold features shine. It also encourages interaction, especially when used to create a stepping-stone path across the dry creek.
Pro Tips:
- Use a level to ensure stones sit evenly and don’t wobble.
- Secure heavy stones with outdoor adhesive if necessary.
- Edge the path with low-growing plants to soften the transition and enhance the illusion.
The floating stones effect is both artistic and functional, offering a unique way to guide the eye—and the feet—across your dry creek bed.
12. DIY Lighting Solutions
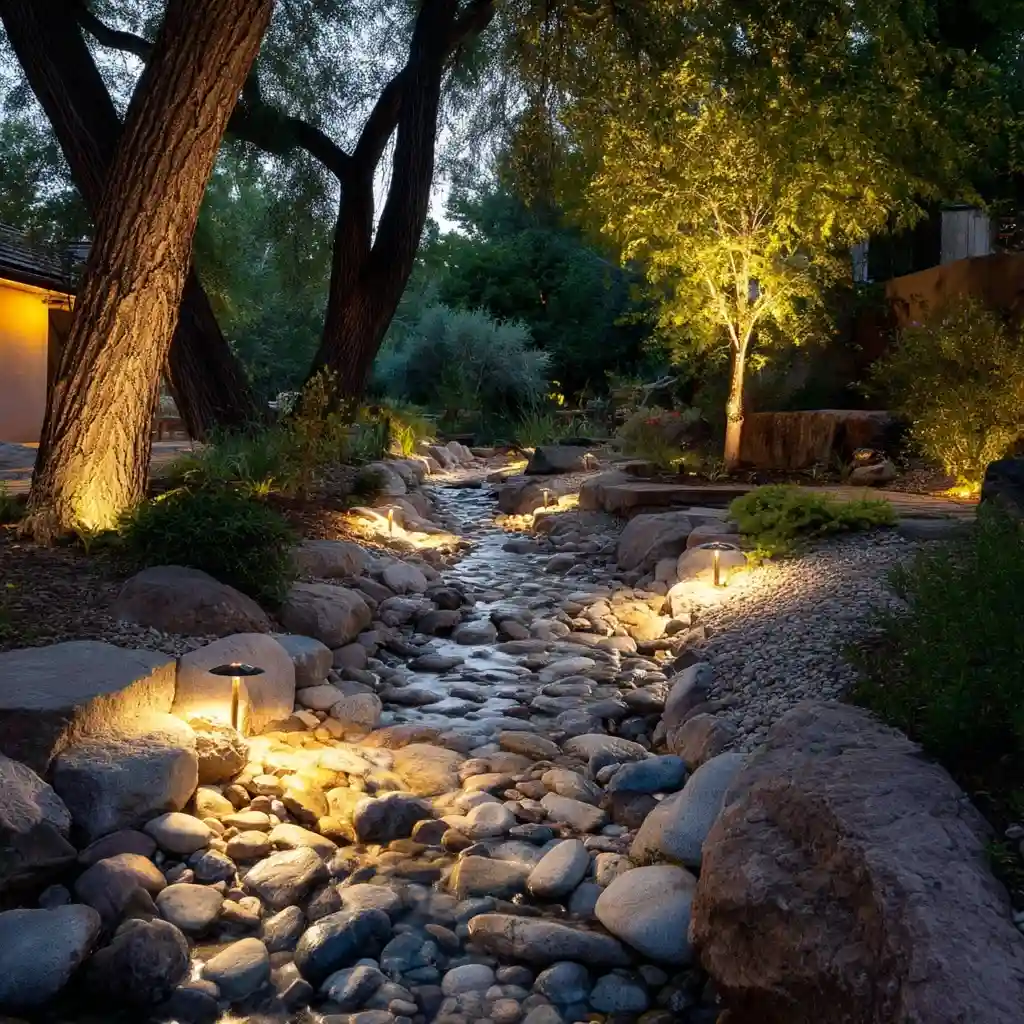
When the sun goes down, your dry creek bed doesn’t have to disappear into the shadows. With a few well-placed DIY lighting solutions, it can become the most striking feature of your yard—even at night.
Lighting enhances the texture of the rocks, the shape of the bed, and the beauty of surrounding plants. It also improves safety if your creek bed intersects walkways or paths.
Best lighting ideas:
- Install low-voltage LED spotlights to highlight focal stones or curves.
- Use solar-powered path lights along the edges for an eco-friendly glow.
- Place subtle uplights behind ornamental grasses to cast dramatic shadows.
- Nest string lights or lanterns in nearby shrubs for ambient lighting.
Consider color temperature when choosing your fixtures—warm white (2700–3000K) gives a natural, inviting look that works well with stone and wood. Avoid harsh, blue-toned lights that can look artificial and detract from your landscape’s organic feel.
Installation Tips:
- Space lights evenly for balance, but leave a few darker areas for depth.
- Tuck wiring under gravel or alongside edging to keep things neat.
- Use weatherproof connectors and timers for convenience and durability.
Lighting transforms your dry creek bed into a 24-hour landscape feature, adding function, mood, and magic to your outdoor space.
13. Focal Stones Arrangement
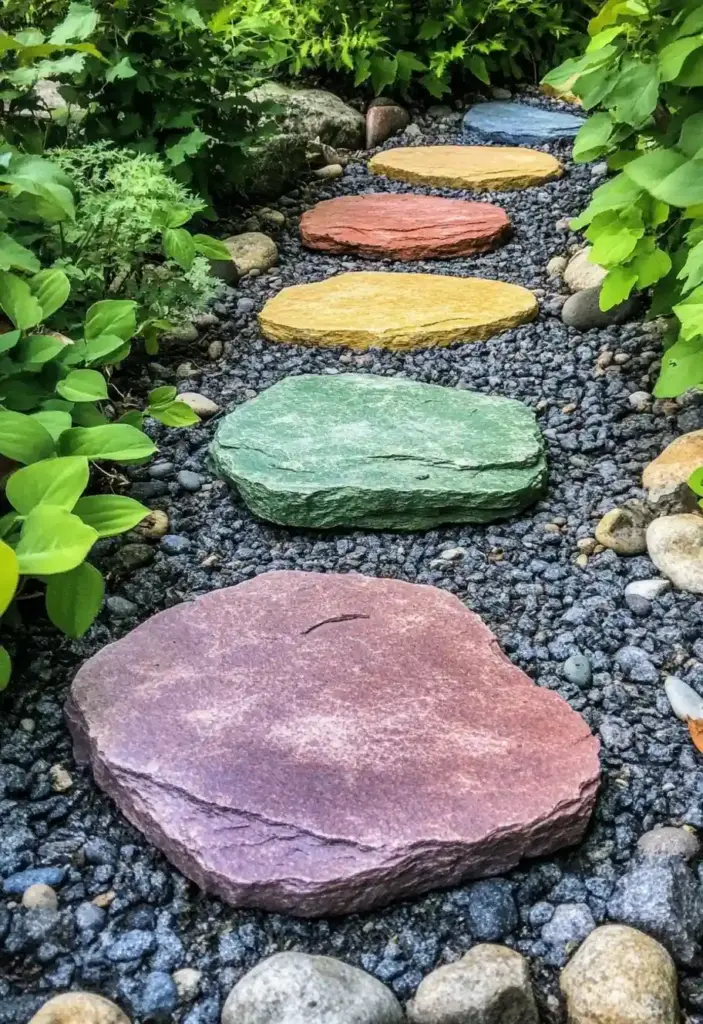
A well-placed focal stone can turn a functional dry creek bed into a powerful visual statement. These larger, eye-catching rocks anchor your design, break up long lines of gravel, and naturally guide the viewer’s gaze across the landscape.
To use focal stones effectively:
- Choose distinctive rocks—larger in size, with bold textures, patterns, or unique shapes.
- Position them at visual turning points, like curves or where the bed narrows or widens.
- Group them in odd-numbered clusters for a more natural and balanced look.
Make sure your focal stones are partially sunken into the ground for a realistic appearance—aim for about one-third of the stone to be buried. This not only stabilizes them but also mimics how rocks settle in natural creek beds.
Design Tips:
- Surround your focal rocks with smaller gravel or river pebbles to enhance contrast.
- Use native grasses or low-spreading groundcover to soften the edges.
- For added stability, secure them with landscape adhesive or nest them into tamped soil.
If your yard has multiple viewing angles—like from a deck, patio, or kitchen window—place stones where they’ll draw attention from those vantage points. These features should feel like natural sculptures, blending beauty and structure seamlessly.
14. Edible Garden Integration
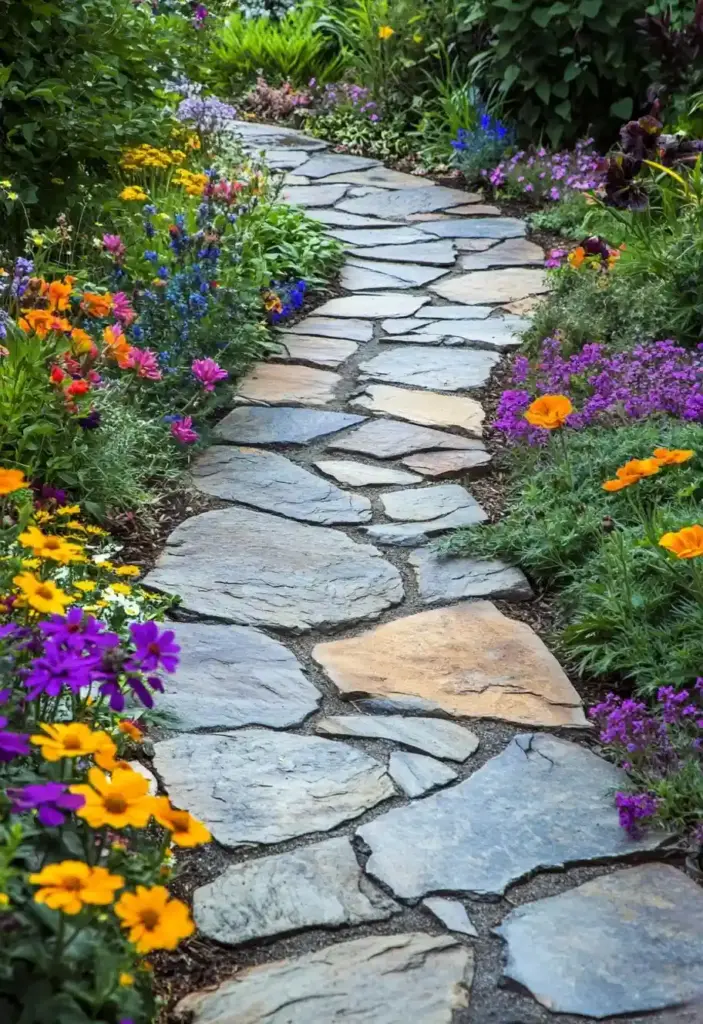
Why not make your dry creek bed not only beautiful, but also delicious? By weaving in edible plants, you can create a garden that pleases the eye and the palate—all while maintaining effective drainage and natural charm.
Edible integration doesn’t mean sacrificing aesthetics. In fact, many herbs, vegetables, and edible flowers are visually stunning and blend well with rocks and gravel.
Tasty and beautiful options:
- Herbs: thyme, oregano, rosemary, and chives grow low and thrive in well-drained soil.
- Edible flowers: nasturtiums, calendula, and violas bring color and are pollinator-friendly.
- Compact veggies: bush beans, lettuce, or kale can be tucked between boulders or at the edges.
Make harvesting easy by adding stepping stones alongside your creek bed. This prevents soil compaction and keeps your feet clean. Also consider raised planting pockets among the rocks using compost-enriched soil for better productivity.
Tips for edible success:
- Use organic fertilizer to nourish your plants without introducing chemicals to your landscape.
- Place sun-loving edibles in the most exposed sections of the creek.
- Group plants with similar water needs to simplify care.
This approach allows your dry creek bed to serve multiple purposes—functional drainage, natural beauty, and a source of fresh herbs and produce for your kitchen.
15. Seasonal Boulders Display
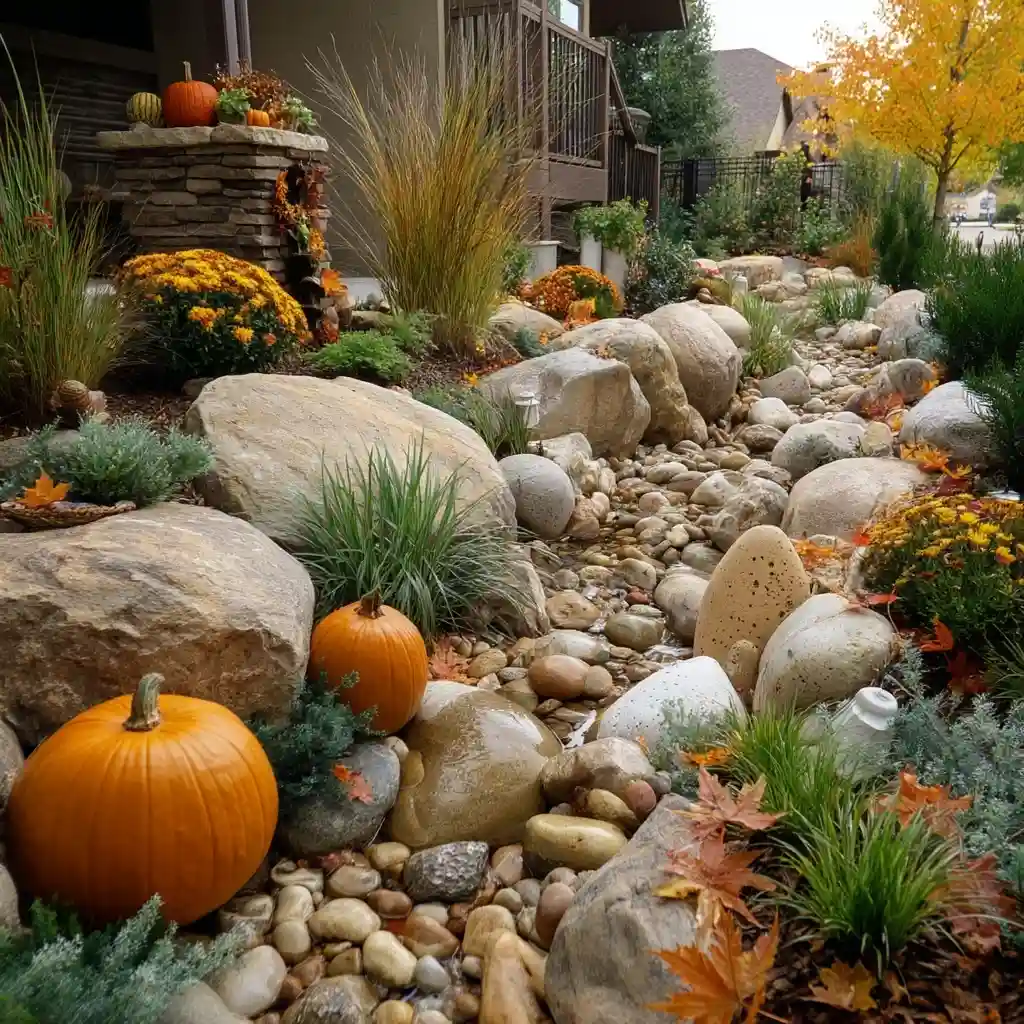
Turn your dry creek bed into a living calendar by featuring seasonal boulders that shift in appearance throughout the year. These bold, sculptural stones serve as both artistic centerpieces and practical elements that stabilize soil and slow water flow.
Instead of replacing them with the seasons, simply decorate or enhance them with natural, weatherproof touches that reflect the time of year.
Ideas for year-round boulder styling:
- Spring: Add moss, potted bulbs, or trailing flowers like alyssum.
- Summer: Surround with bright annuals, solar lights, or driftwood accents.
- Fall: Tuck in ornamental gourds, pumpkins, or dried cornstalks.
- Winter: Add evergreen clippings, pinecones, or weatherproof string lights.
Use landscape paint or chalk-safe dyes for temporary designs like leaf outlines or snowflake stencils that wash away naturally over time. Just make sure any materials you use are non-toxic and won’t leach into the soil.
Installation Tips:
- Set boulders deep into the ground for stability—at least one-third buried.
- Nestle them into coarser gravel or larger river rock to prevent shifting.
- Use contrasting textures—smooth boulders against rough mulch or jagged stone—for added drama.
By embracing the seasons, your dry creek bed becomes a dynamic and ever-changing landscape that feels alive and connected to nature.
16. Travel-Theme Elements
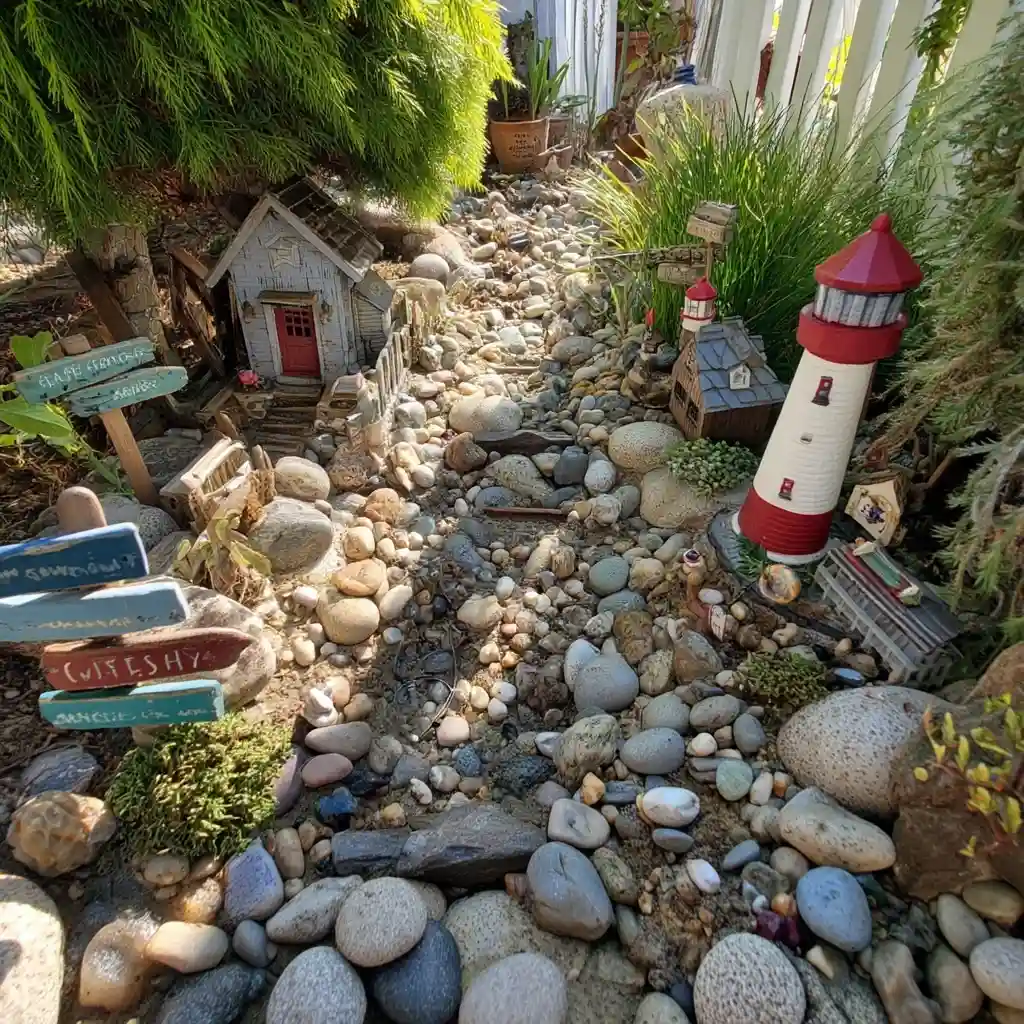
Bring a sense of adventure to your dry creek bed by adding travel-themed elements that reflect your favorite destinations or journeys. Whether you’re inspired by mountain trails, tropical beaches, or desert landscapes, your yard can become a miniature escape—without ever packing a bag.
Start by choosing a regional motif:
- Coastal: Use smooth beach stones, driftwood, and seashells.
- Mountainous: Incorporate rugged boulders, pine mulch, and alpine plants.
- Desert: Choose succulents, cacti, and sandstone accents.
Add personality with decorative signs featuring place names, coordinates, or welcome messages in different languages. You can also integrate small figurines, like miniature lighthouses, pagodas, or animal totems, nestled between rocks for subtle storytelling.
Practical tips for travel-themed designs:
- Keep decorative elements low-profile and weather-resistant.
- Use landscape adhesive or stakes to secure items against wind or water runoff.
- Stick with a consistent color palette to avoid visual clutter.
This approach turns your dry creek bed into more than a drainage feature—it becomes a conversation piece, a tribute to your wanderlust, and a creative way to personalize your outdoor space.
17. Incorporating Paths and Trails
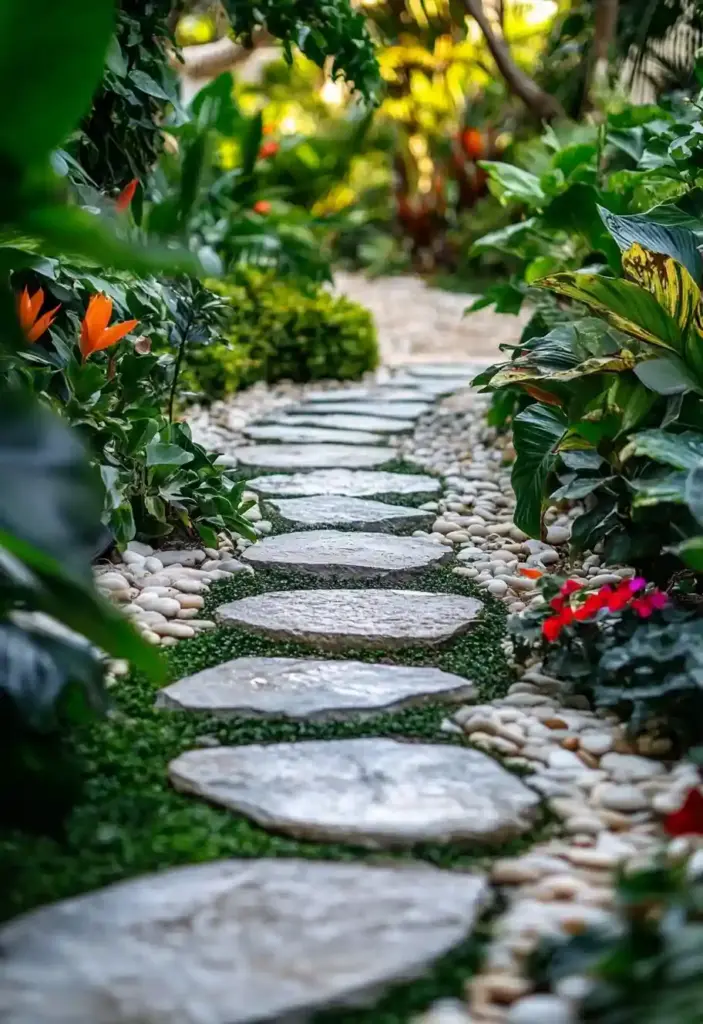
A thoughtfully placed path through or alongside your dry creek bed turns it from a static feature into an interactive landscape element. Trails invite people to explore, encourage movement, and make your garden feel larger and more immersive.
The key is to design pathways that complement your creek’s natural flow:
- Curved paths enhance visual interest and mimic real streambeds.
- Stepping stones or large flagstone slabs let visitors cross the creek safely and stylishly.
- Crushed gravel paths work well alongside the creek, offering excellent drainage and texture.
For cohesion, choose materials that echo your creek bed’s stones. If your dry creek uses river rock, pick similarly rounded pavers or gravel. For more rugged creek beds, rough-cut stone or even reclaimed wood planks can fit beautifully.
Practical additions:
- Use edging (metal, stone, or thick plants) to keep your trail materials in place.
- Add native groundcover plants like creeping thyme between stepping stones for softness.
- Make sure paths are level, stable, and safe, especially if water occasionally flows through them.
Not only do paths improve usability, but they also increase visual access—letting you enjoy your dry creek bed from multiple angles and transforming it into the spine of your garden design.
18. Rock Art Creations
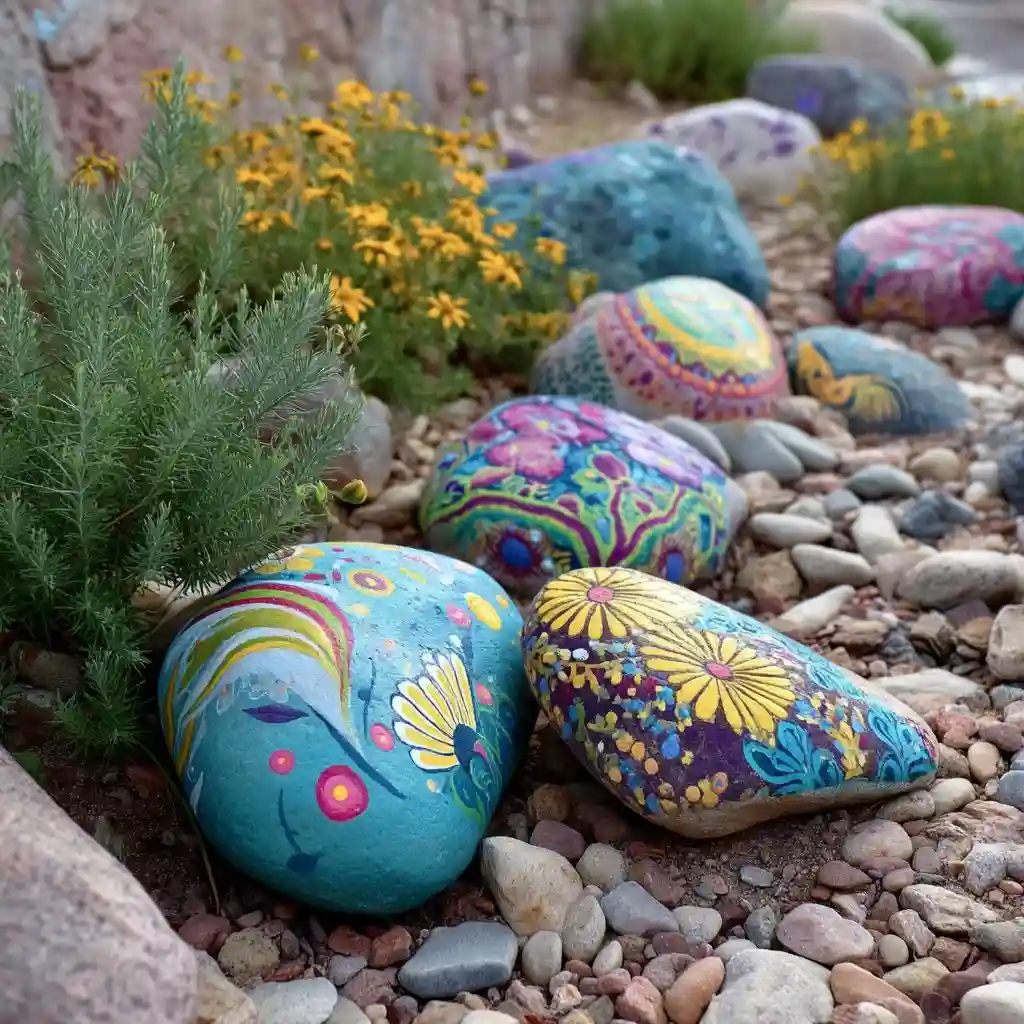
Inject creativity and character into your dry creek bed with rock art creations—a fun, personal way to turn simple stones into storytelling elements. Whether you’re showcasing painted rocks, mosaics, or naturally arranged patterns, this approach adds a touch of whimsy and charm to your landscape.
Start by gathering smooth river rocks or flat stones as your canvas. Use weatherproof acrylic paint or outdoor markers to add designs that reflect your personality, seasonal motifs, or themes like animals, nature, or quotes.
Creative rock art ideas:
- Paint ladybugs, bees, or butterflies to blend with plants and pollinators.
- Use a series of stones to create a mosaic spiral or sunburst pattern.
- Arrange contrasting pebbles to form inlaid designs within the creek path.
- Add glow-in-the-dark paint for magical nighttime effects.
Tips for lasting results:
- Seal finished artwork with a clear, UV-resistant topcoat to protect from weather and fading.
- Place rock art at visible bends or transitions in the creek for surprise visual appeal.
- Anchor lightweight painted stones using outdoor adhesive or nestle them partially into gravel.
Rock art brings a playful, human element to your dry creek bed—and it’s a great weekend project for families or solo creators alike. Best of all, it evolves with your imagination and can be updated anytime.
19. Incorporate Wildlife Habitat
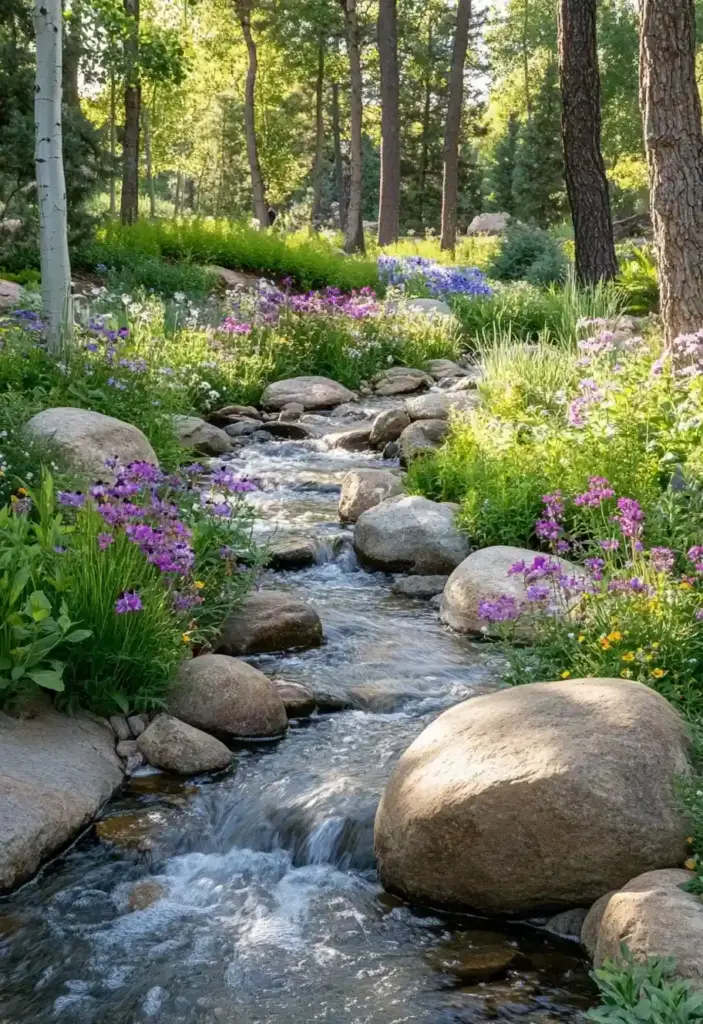
A well-designed dry creek bed can do more than beautify your yard—it can become a welcoming space for local wildlife, too. By incorporating the right elements, your landscape can support birds, butterflies, bees, and beneficial insects, creating a balanced ecosystem just outside your door.
Key habitat-friendly elements:
- Native plants: Choose species that provide nectar, seeds, or shelter for local fauna.
- Layered vegetation: Include low groundcovers, medium-height shrubs, and taller grasses or perennials to offer diverse hiding spots.
- Water source: Place a shallow birdbath or a pebble-filled saucer for bees to safely drink.
- Natural shelter: Stack flat stones to form small crevices or tuck in driftwood and fallen logs to attract amphibians and insects.
Avoid pesticides and synthetic herbicides, which can harm pollinators and disrupt your habitat’s health. Instead, use compost and mulch to improve soil naturally.
You can also install a bird feeder near the creek bed to bring feathered visitors—and if you’re lucky, you might even attract butterflies with milkweed or joe-pye weed tucked along the edges.
Bonus Tip: Use landscape fabric beneath the rockwork to keep the bed neat while still allowing plant roots and rainfall to reach the soil.
By inviting wildlife in, your dry creek bed becomes not only a drainage solution and a design element—but also a living, breathing part of the local ecosystem.
Conclusion
A well-planned dry creek bed is more than just a clever solution for drainage—it’s a creative canvas for expression, beauty, and biodiversity. Whether you’re aiming for a sleek minimalist look, a vibrant seasonal showcase, or a cozy wildlife haven, these 19 DIY ideas offer endless ways to personalize your landscape while managing water effectively.
By incorporating a thoughtful mix of stones, plants, and design themes, your creek bed can become the standout feature of your yard—functional, visually stunning, and uniquely yours.
🌿 Love gardening inspiration? Follow me on Pinterest for bold plant ideas, tips, and seasonal color!
More Posts
