Transform Your Outdoor Space on a Budget with These Gorgeous Fixes
Creating a stunning outdoor space doesn’t have to drain your wallet. With a bit of creativity, smart planning, and a few DIY-friendly techniques, you can dramatically enhance your curb appeal—without spending a fortune. Whether you’re dealing with a small backyard or a spacious front lawn, these cheap landscaping ideas that look expensive will help you achieve a polished, designer-worthy look on a budget.
From budget-friendly flower beds to stylish hardscaping accents, each tip in this guide is designed to add beauty, value, and personality to your garden. Let’s dig in!
1. 💧 Add a Budget-Friendly Water Feature
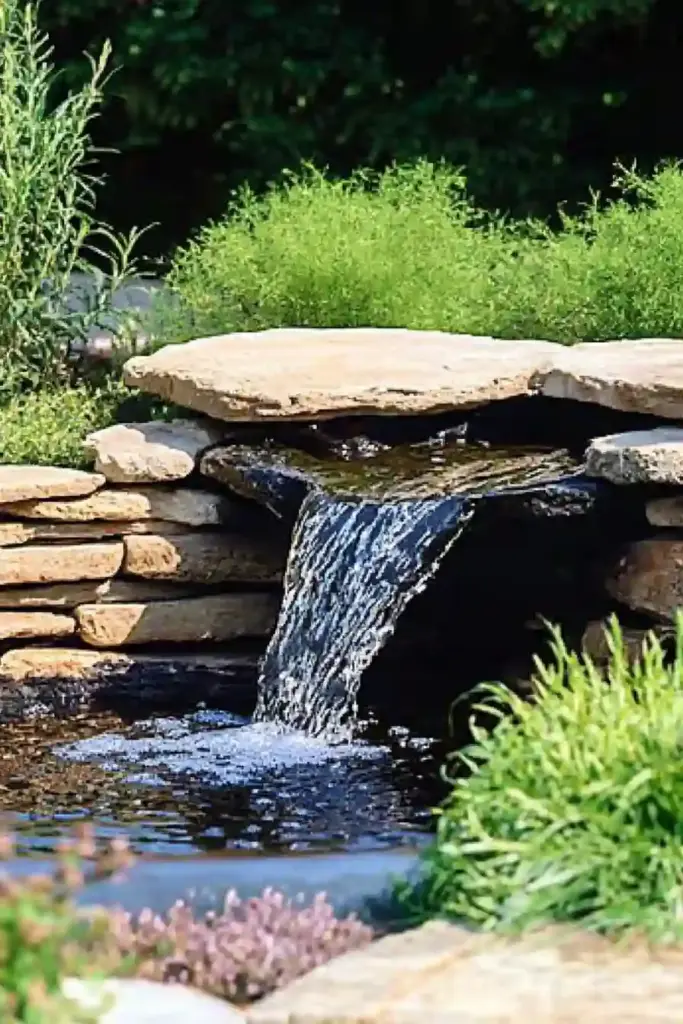
A water feature instantly elevates your garden, adding a tranquil soundscape and a luxurious focal point. The good news? It doesn’t have to cost a lot.
You can easily build a small fountain using stacked pots, a repurposed birdbath, or even an old whiskey barrel paired with a submersible pump. Want something more unique? Try a DIY bubbling rock fountain—they’re surprisingly simple to create and maintain.
Why it works:
- Adds movement and sound to your yard
- Attracts birds and pollinators
- Makes your space feel like a high-end retreat
Pro tip: Tuck your water feature into a flower bed or at the center of a gravel path for a cohesive, elegant design.
2. 🌸 Flower Beds That Pop Without Breaking the Bank
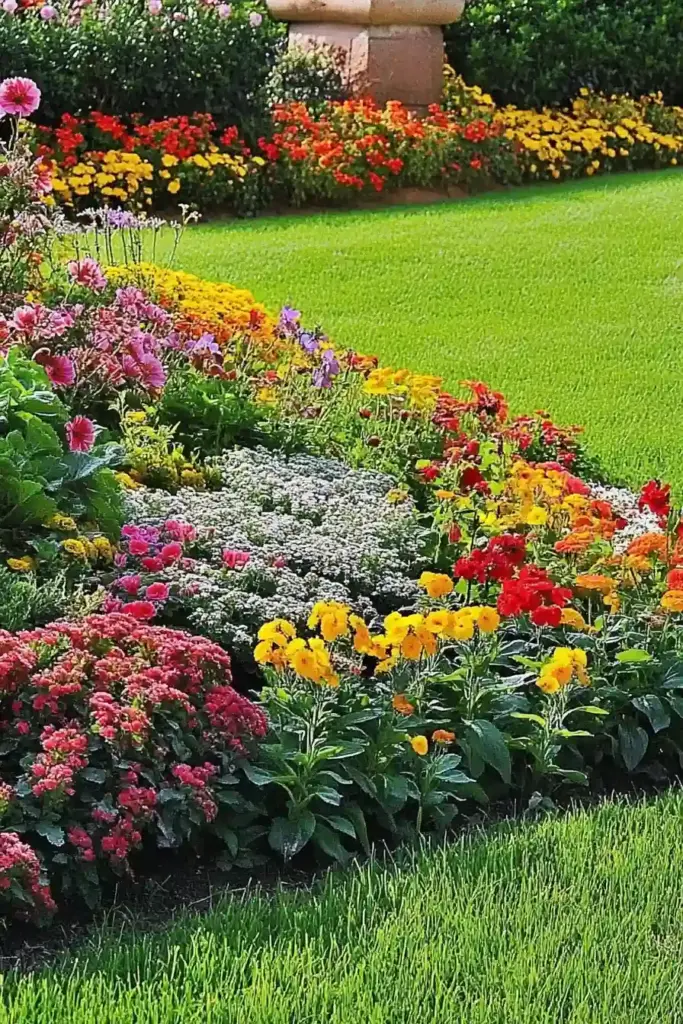
Nothing adds instant charm to a landscape like a vibrant flower bed—and you don’t need a professional landscaper to create one. With some basic tools and a plan, you can carve out affordable garden beds that look professionally designed.
Smart Ways to Build Budget Flower Beds:
- Choose hardy, inexpensive perennials like black-eyed Susans, coreopsis, or daylilies that return year after year.
- Use free or low-cost edging like repurposed bricks, logs, or recycled plastic borders.
- Group plants by height and color for maximum visual impact with minimal effort.
- Mulch generously to retain moisture, suppress weeds, and make your beds look tidy and intentional.
Place your flower beds along walkways, fences, or the base of trees to create natural focal points that draw the eye—and attention—without spending a dime on new hardscaping.
Expert Tip: Buy plants late in the season when garden centers mark them down, then plant them before the first frost or overwinter in pots.
3. 🪨 Turn a Boulder into a Statement Piece
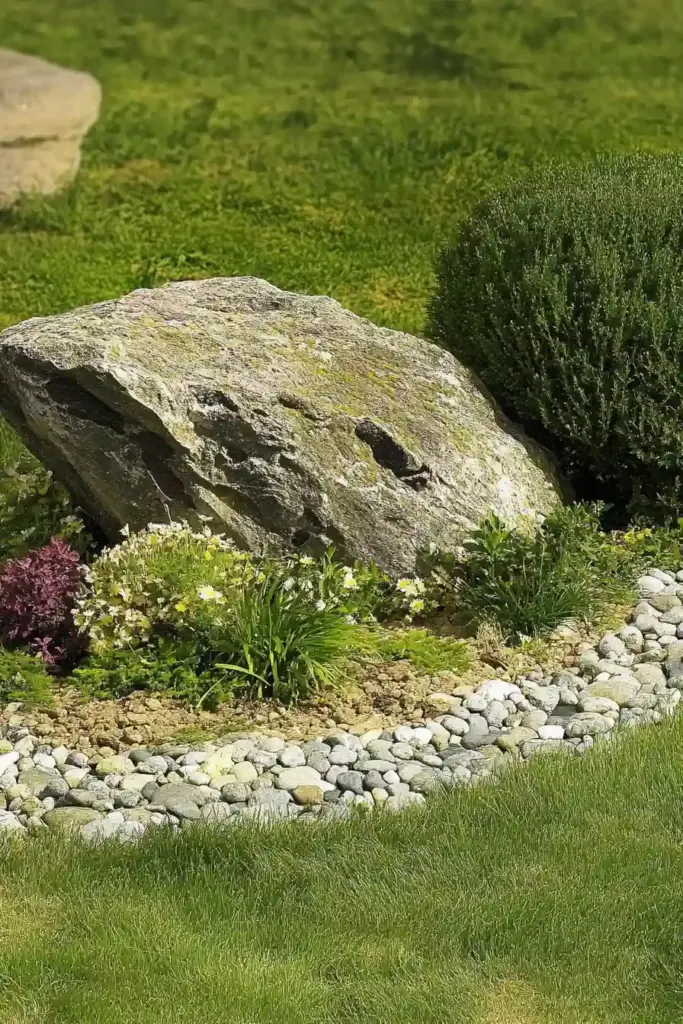
Have a random large rock sitting in your yard? Don’t remove it—embrace it as a natural feature! With a bit of creative placement, a boulder can become a high-end focal point in your landscaping design.
How to Make a Boulder Look Intentional:
- Surround it with gravel, ornamental grasses, or creeping ground cover like thyme or sedum for a polished look.
- Create a rock garden using multiple stones of varying sizes and drought-tolerant plants like succulents.
- Add solar uplighting to highlight the texture and create a dramatic nighttime effect.
Why it’s effective: A strategically placed rock adds texture and dimension to flat yards, and the best part—it’s completely free if it’s already on your property.
Bonus Idea: Can’t find a boulder? Make your own faux version using chicken wire and hypertufa (a mix of cement, peat moss, and perlite). It’s lightweight, durable, and looks surprisingly real.
4. 🌼 Grow Low-Maintenance Flowers for Effortless Beauty
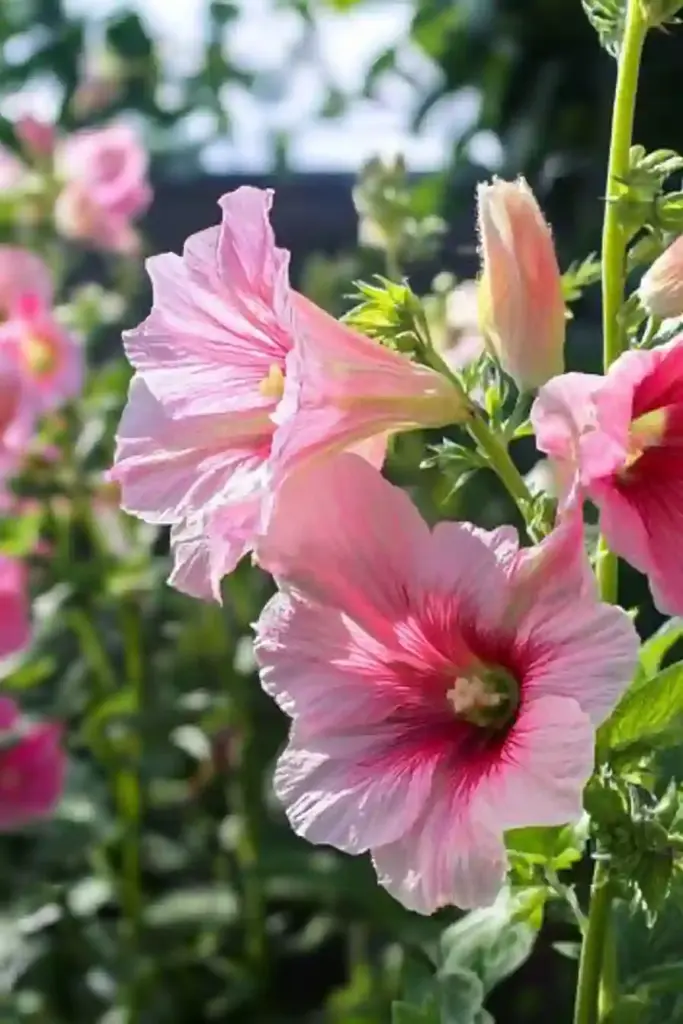
Want a yard full of color without the constant watering, feeding, and pruning? Low-maintenance flowers are your best friend when it comes to cheap landscaping ideas that look expensive.
These blooms thrive with minimal care, making them perfect for busy homeowners or beginners looking to level up their landscaping game.
Top Low-Maintenance Flower Picks:
- Zinnias: Bright, bold, and drought-tolerant—perfect for sunny spots.
- Marigolds: Naturally pest-repelling and super easy to grow from seed.
- Hollyhocks: Towering and whimsical, ideal for adding vertical interest.
- Sunflowers: A classic favorite that adds instant cheer and draws pollinators.
Plant them in clusters for impact, and mix heights for a layered, designer look. They’ll flourish with just basic care and reward you with a lush, colorful display.
Pro Tip: Add mulch around your flower beds to reduce weeds and retain moisture—saving you time and water bills.
5. 🪴 Upgrade Your Planters with Style and Personality
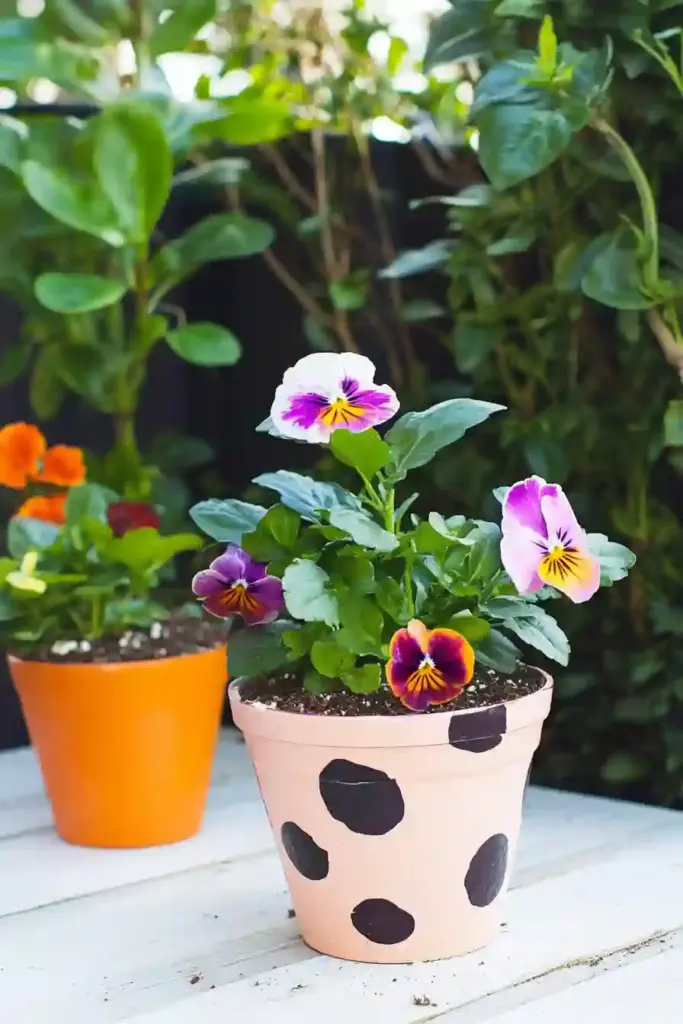
Planters don’t have to be basic or boring. In fact, with a few clever upgrades, they can become the star of your landscaping design—even on a tight budget.
Easy Ways to Elevate Your Planters:
- Repurpose household items like old buckets, baskets, or even worn-out boots for rustic charm.
- Paint plain terra cotta pots with bold colors or patterns for a modern vibe.
- Use salvaged wood or crates to build custom containers that fit your space perfectly.
- Add legs or stands to vary planter height and add dimension to your layout.
Why it works: Stylish planters create visual interest and help define outdoor areas like patios, entryways, or garden corners. Even small spaces can feel curated with the right container combo.
Eco-Friendly Tip: Reuse items you already have—mason jars, tin cans, or kitchen colanders—to create quirky, charming planters while keeping waste out of the landfill.
6. 🚶 Gravel Garden Walkways That Look Luxe for Less
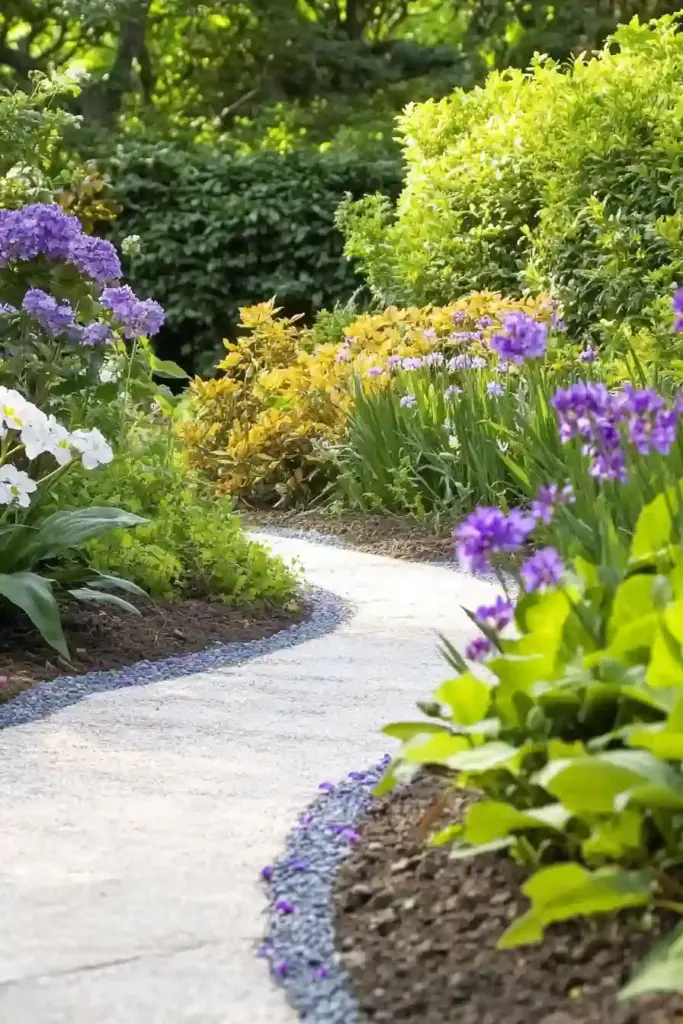
Want to add structure to your landscape without pouring concrete or laying expensive pavers? Gravel walkways are a budget-friendly, stylish solution that instantly elevates the look of any outdoor space.
Why Gravel Walkways Make Sense:
- Affordable materials: Crushed gravel, pea stone, or decomposed granite are all easy on the wallet.
- Low maintenance: Gravel naturally suppresses weeds and drains well.
- Customizable: Choose from a variety of colors and textures to match your home’s style.
Quick DIY Tip:
Lay down landscape fabric beneath the gravel to prevent weeds from growing through and keep the path tidy for years to come.
Gravel paths are perfect for guiding visitors through gardens, around flower beds, or from the patio to the shed—all while making your yard look polished and professionally designed.
Bonus Style Tip: Line the walkway with solar lights or edging stones to enhance nighttime appeal and create crisp definition.
7. 🌿 Deck Railing Planters to Maximize Small Spaces
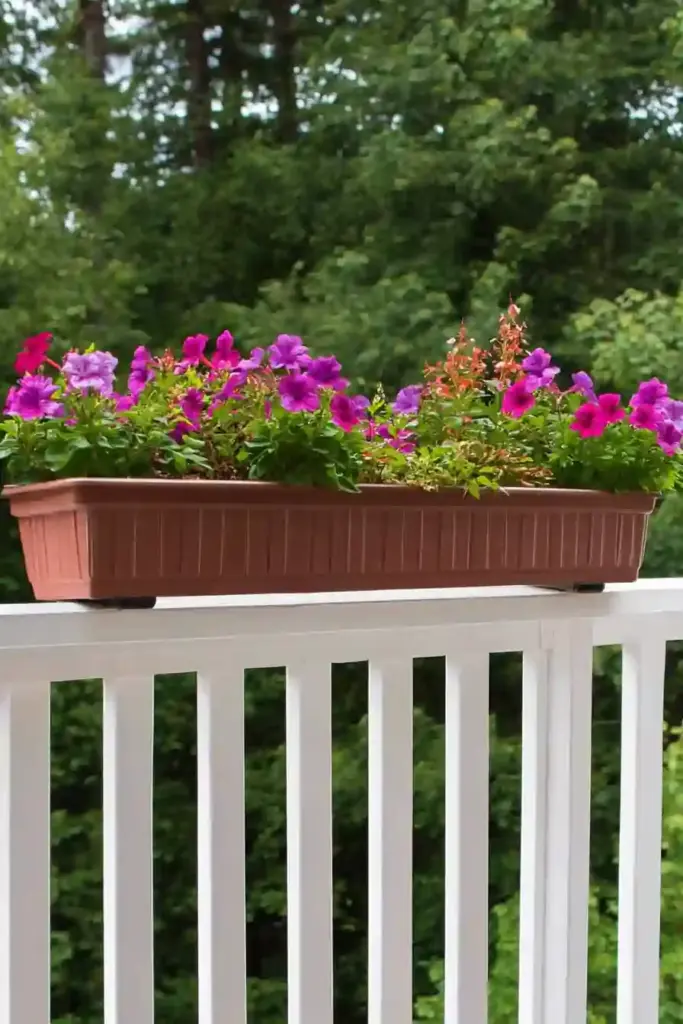
If you’re working with a compact yard, balcony, or rooftop patio, don’t let vertical space go to waste! Deck railing planters are an affordable way to add greenery without sacrificing square footage.
Benefits of Railing Planters:
- Space-saving: Perfect for urban gardens or small decks.
- Easy installation: Most attach with brackets or hooks—no tools required.
- Customizable: Paint them to match your trim, or mix in herbs and flowers for a multi-functional garden.
You can find budget-friendly railing planters at garden centers or get creative with DIY versions using wooden crates, recycled tin containers, or even repurposed gutters.
Design Tip: Alternate between trailing plants like petunias or ivy and upright herbs or flowers for a lush, layered effect that looks high-end and intentional.
8. 🌸 Flower Arches That Add Instant Charm
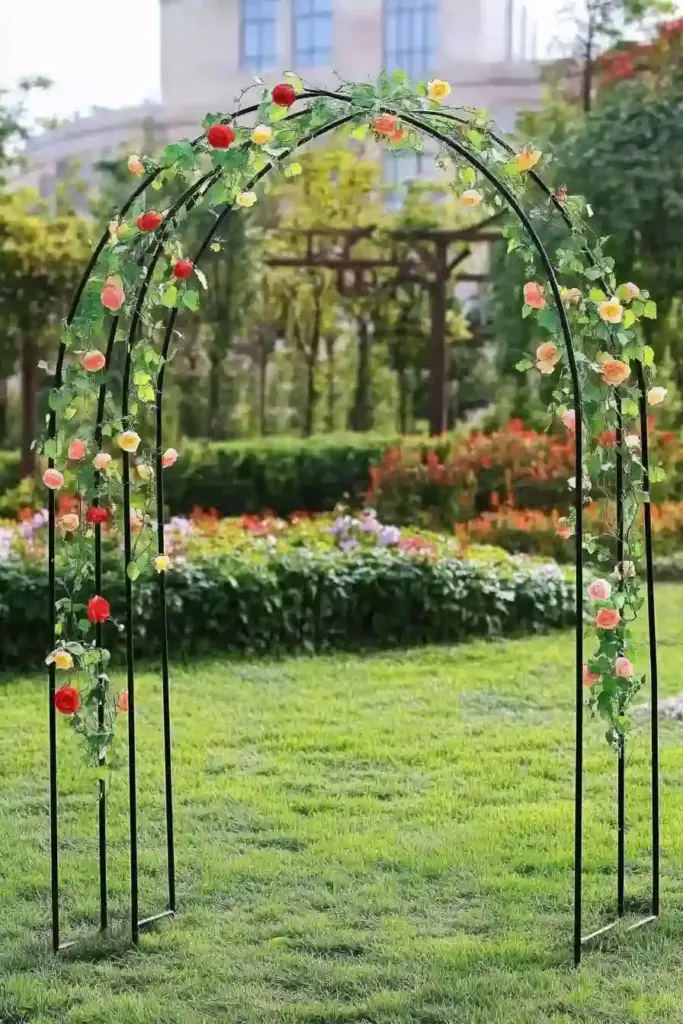
Want to make your yard feel like a secret garden getaway? Flower arches are a dreamy, romantic touch that adds vertical interest—and they’re easier (and cheaper) to build than you think.
Why You’ll Love a Flower Arch:
- Creates a grand entrance to garden paths or patio spaces
- Perfect for climbing plants like roses, clematis, morning glories, or sweet peas
- Adds structure and draws the eye upward for visual balance
You can purchase affordable metal or wooden arches from garden stores—or DIY your own using PVC pipes or reclaimed wood for a rustic twist. Paint it, stain it, or let nature take over as the blooms grow.
Budget Tip: Start with fast-growing climbers like nasturtiums or moonflowers for quick coverage and bold color without the wait.
Placement Ideas: Over a garden gate, as an entry to a walkway, or even free-standing as a focal point in your lawn.
9. 🌱 Repurpose Old Containers to Start a Garden for Less
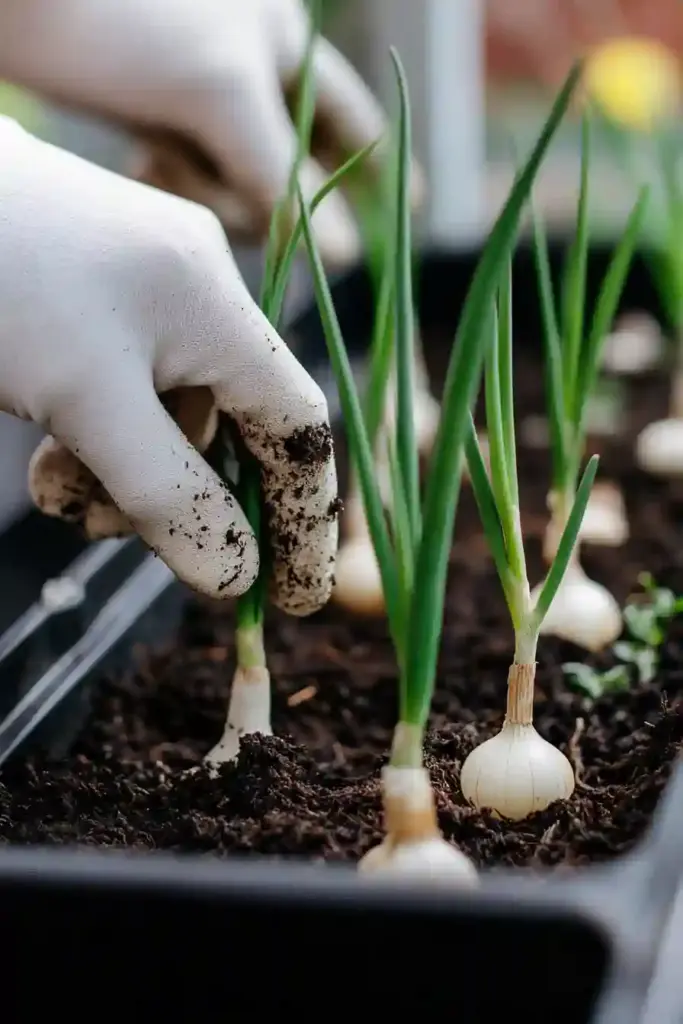
You don’t need fancy pots or seed trays to start a thriving garden. With a little imagination, everyday household containers can become the perfect home for seedlings.
Great Repurposed Items for Starting Seeds:
- Egg cartons
- Yogurt cups or sour cream containers
- Tin cans and mason jars
- Takeout containers with clear lids (mini greenhouses!)
- Toilet paper rolls for biodegradable seed starters
Why it’s genius:
- Reduces waste and saves money
- Gives new life to items you’d normally toss
- Ideal for experimenting with different seeds without committing to full garden beds
Just make sure to clean and sanitize any containers before planting to prevent mold or bacteria from harming your seedlings. Add drainage holes at the bottom, fill with seed-starting mix, and you’re good to grow!
Bonus Tip: Label your containers using popsicle sticks or wine corks on skewers to stay organized and track what’s sprouting.
10. 🔥 DIY Fire Pits That Bring Warmth and Wow Factor
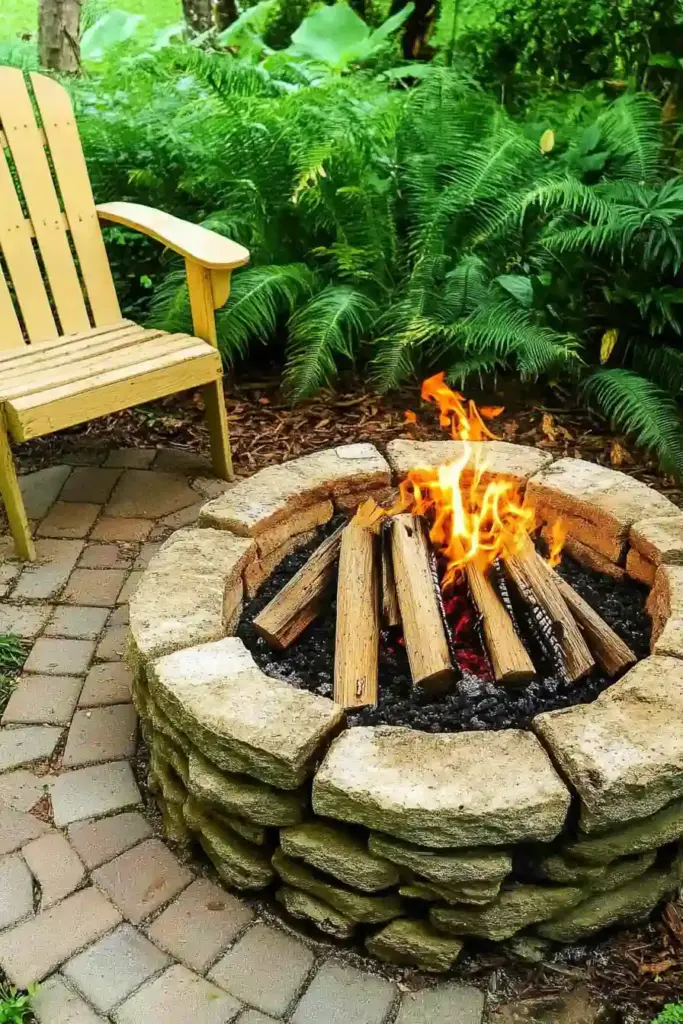
Nothing says cozy outdoor living like a fire pit—and the best part? You don’t need to hire a contractor or spend big to enjoy one. With some basic materials and elbow grease, you can create a DIY fire pit that looks expensive but costs under $100.
Affordable Fire Pit Options:
- Concrete pavers or retaining wall blocks: Stack in a circle and secure with construction adhesive.
- Metal fire ring or repurposed washing machine drum: Durable, heat-safe, and budget-friendly.
- Gravel base: Helps with drainage and adds a finished look.
Where to place it: Choose a safe, level spot away from trees, fences, and structures. Add gravel or sand as a base to create a clean perimeter.
Style Tip: Circle your fire pit with inexpensive Adirondack chairs or benches made from pallets for a relaxed, welcoming vibe.
Safety Reminder: Always check local fire codes and regulations before building or lighting your fire pit!
11. 🪨 Stepping Stones That Lead the Way in Style
Stepping stones are a small detail that make a big visual impact. Whether you’re connecting different areas of your yard or just adding a whimsical garden path, they’re one of the most affordable ways to make your landscaping look high-end.
Stepping Stone Options That Won’t Break the Bank:

- Concrete pavers: Widely available and easy to arrange
- Natural flat stones or flagstone fragments: Great for rustic charm
- DIY stones: Pour quick-set concrete into molds or even large leaves for custom shapes
Place them in gravel, mulch, or even grass for different effects, and space them naturally for a casual, welcoming path. For added flair, plant creeping thyme or moss between the stones—they’ll soften the look and add a hint of color and fragrance.
Creative Tip: Use irregular shapes and patterns for an organic, meandering path that feels like it’s always been there.
12. 🌷 Save Tender Bulbs for Seasonal Blooms Without Rebuying
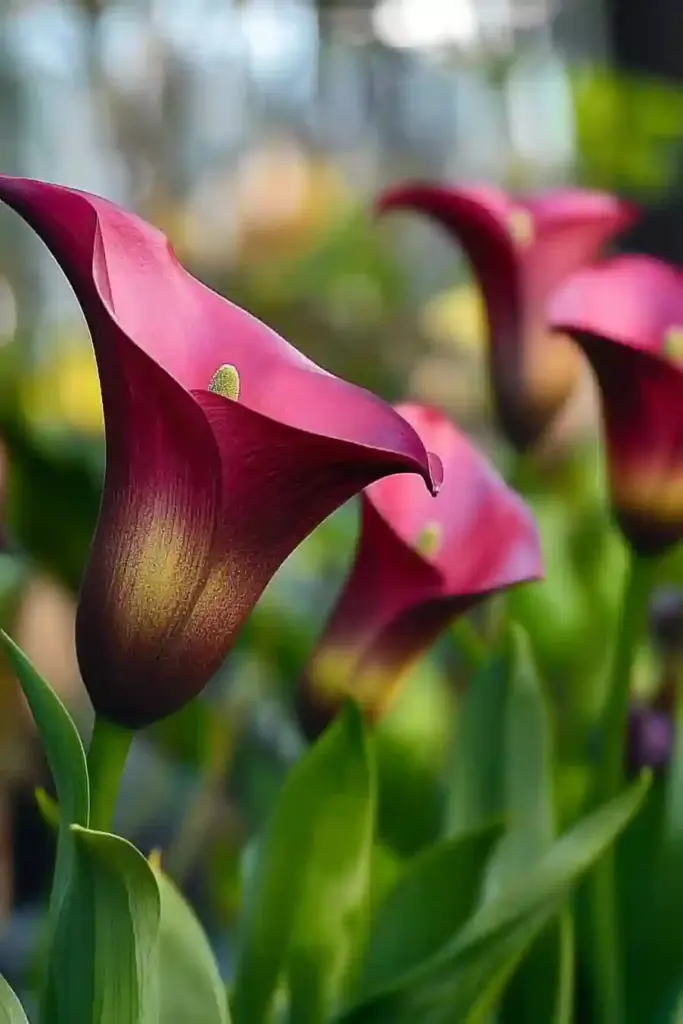
Why spend money every year on new bulbs when you can store and reuse them season after season? With just a bit of prep, you can keep your favorite blooms coming back year after year—no repurchasing required.
What Are Tender Bulbs?
These are bulbs like dahlias, gladiolus, canna lilies, and caladiums that can’t survive freezing temperatures and need to be lifted and stored over winter.
How to Store Them Properly:
- Dig them up after the first frost when the foliage starts to die back.
- Gently brush off soil—don’t wash them, as moisture encourages rot.
- Let them dry out completely in a warm, airy place for a few days.
- Store them in paper bags, cardboard boxes, or mesh sacks filled with sawdust or peat moss in a cool, dark place.
Why it’s worth doing:
- Saves money every season
- Keeps your favorite varieties going strong
- Reduces waste and supports sustainable gardening
Pro Tip: Label each bag or container so you know exactly what’s what when it’s time to plant again.
13. 🌾 Use Mulch to Create Contrast and Boost Curb Appeal
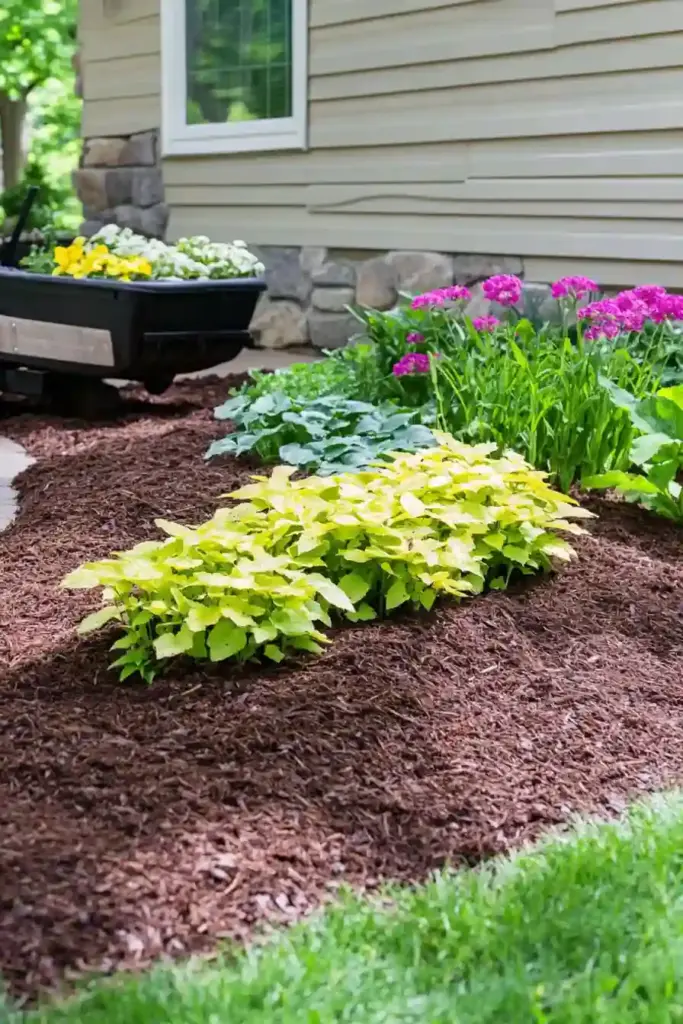
Mulch isn’t just about weed control—it’s also one of the easiest ways to make your garden beds look clean, cohesive, and professionally landscaped. And the best part? It’s super affordable and widely available.
Why Mulch Is a Must-Have:
- Defines flower beds and borders
- Retains soil moisture, saving on watering
- Suppresses weeds without chemicals
- Adds rich color and texture to highlight your plants
Dark brown or black mulch creates bold contrast against green foliage and colorful flowers, making every plant pop. You can even get free mulch from local municipalities or tree services in many areas—just ask!
Pro Tip: Refresh mulch each season for a tidy, polished look. A fresh layer can make your entire yard feel instantly upgraded.
Bonus Idea: Try colored mulch or bark chips to match your home’s exterior or play with visual tone—just be sure it’s pet- and plant-safe.
14. 🪵 DIY Planters That Are Creative, Cheap, and Completely Custom

Why spend money on store-bought planters when you can craft your own unique containers from materials you already have? DIY planters not only save you cash, but they also let your personality shine in your outdoor space.
Easy & Affordable DIY Planter Ideas:
- Old wooden crates or barrels: Sand and seal them for rustic charm.
- Recycled tires: Paint them in bold colors or stack for tiered planting.
- Plastic jugs or buckets: Cut, paint, and add drainage holes for a quick upcycle.
- Drawer planters: Repurpose unused dresser drawers for vintage flair.
Why it’s genius:
- You control the size, shape, and style
- It’s eco-friendly and reduces waste
- Custom designs add character that store-bought options can’t match
Design Tip: Coordinate your DIY planters with your outdoor decor theme—boho, farmhouse, modern, or whimsical—for a cohesive look.
Pro Move: Group planters in odd numbers and vary the heights for visual depth and designer-worthy vibes.
15. ⛰️ Add Mounds for Dimension in Flat Landscapes
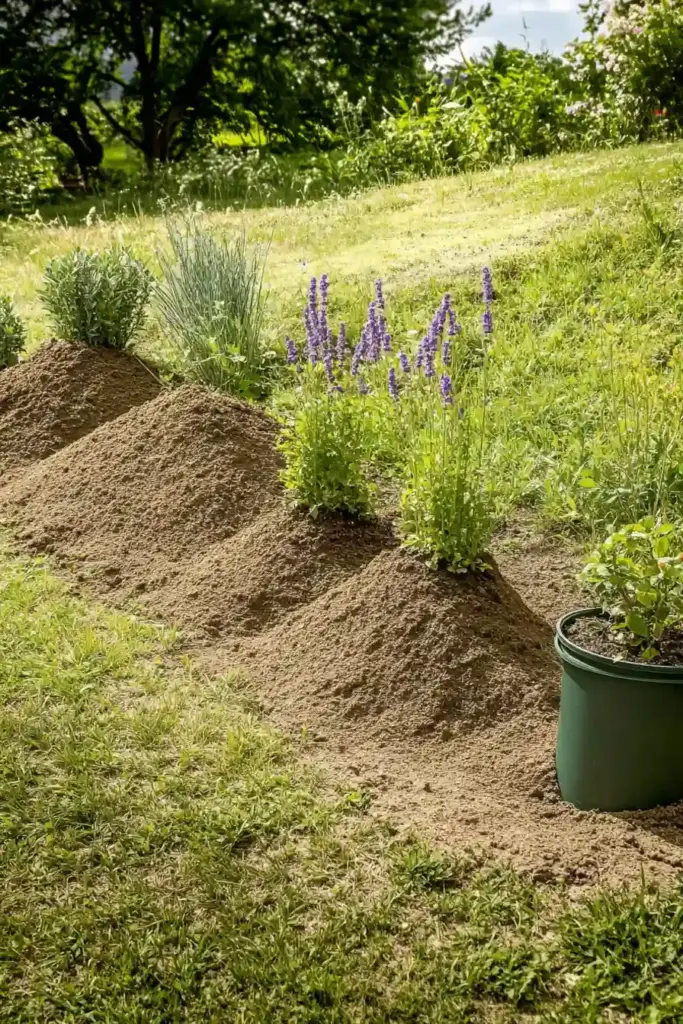
If your yard feels flat and uninspired, adding mounds (also known as berms) is a simple yet dramatic way to give it shape and movement—without spending much at all.
Benefits of Landscaping Mounds:
- Creates natural focal points for planting
- Improves drainage in soggy areas
- Adds height and depth to an otherwise bland lawn
- Offers a great backdrop for layered plantings or ornamental grasses
All you need is some extra soil, compost, and mulch. Shape the mound into a gentle slope (aim for 1 foot high for every 3–4 feet wide) and top with a mix of low-maintenance shrubs, perennials, or even small trees.
Pro Tip: Use curves and asymmetry for a more natural, organic look. Straight lines and even shapes can feel too artificial.
Bonus Idea: Place a large rock or garden sculpture atop a mound for an extra “designer touch” that feels expensive—but isn’t.
16. 🌳 Create a Layered Landscape for Visual Impact
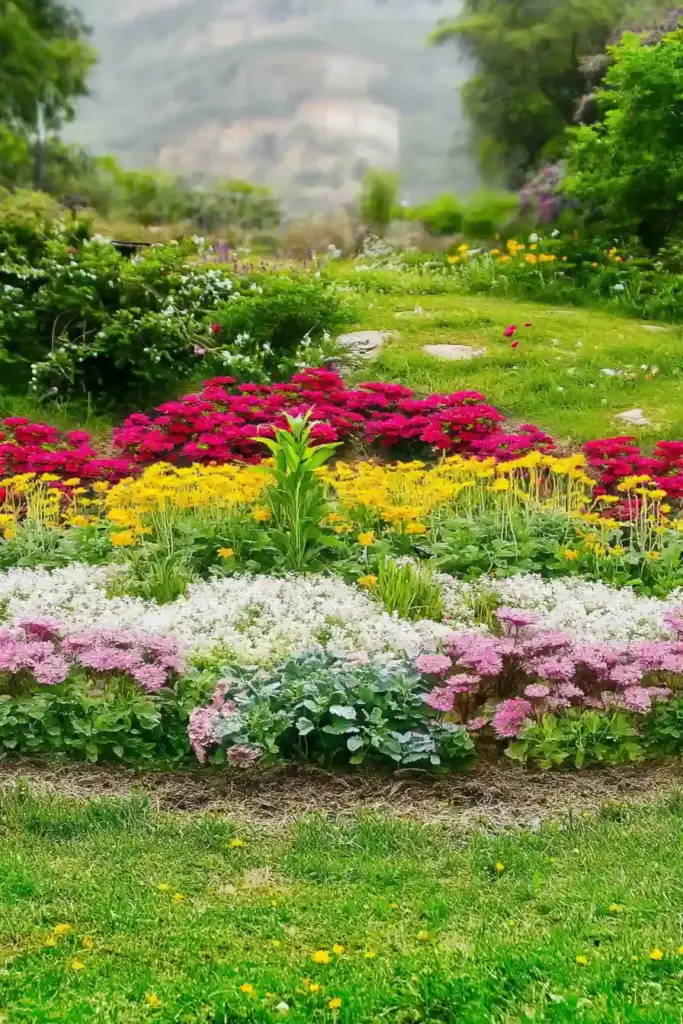
If you want your yard to look lush and professionally planned, layering your plants is one of the most effective (and affordable) techniques. This design approach mimics nature by combining varying heights, textures, and colors—and the results look anything but budget.
How to Design a Layered Landscape:
- Back row: Taller shrubs, ornamental grasses, or small trees
- Middle row: Mid-sized perennials or flowering bushes
- Front row: Ground covers, low-growing blooms, or decorative mulch
This not only makes your garden visually dynamic, but it also maximizes space and gives your landscape a sense of depth and movement.
Where it works best:
- Along fences or the side of your house
- Around patios and walkways
- In large open garden beds that need structure
Planting Tip: Group plants in odd numbers and repeat elements throughout the garden to create flow and cohesion.
Pro-Level Bonus: Include a mix of evergreen and seasonal plants so your landscape looks great all year long—even in the off-season.
17. 🚗 Driveway Edging Accents That Instantly Upgrade Curb Appeal
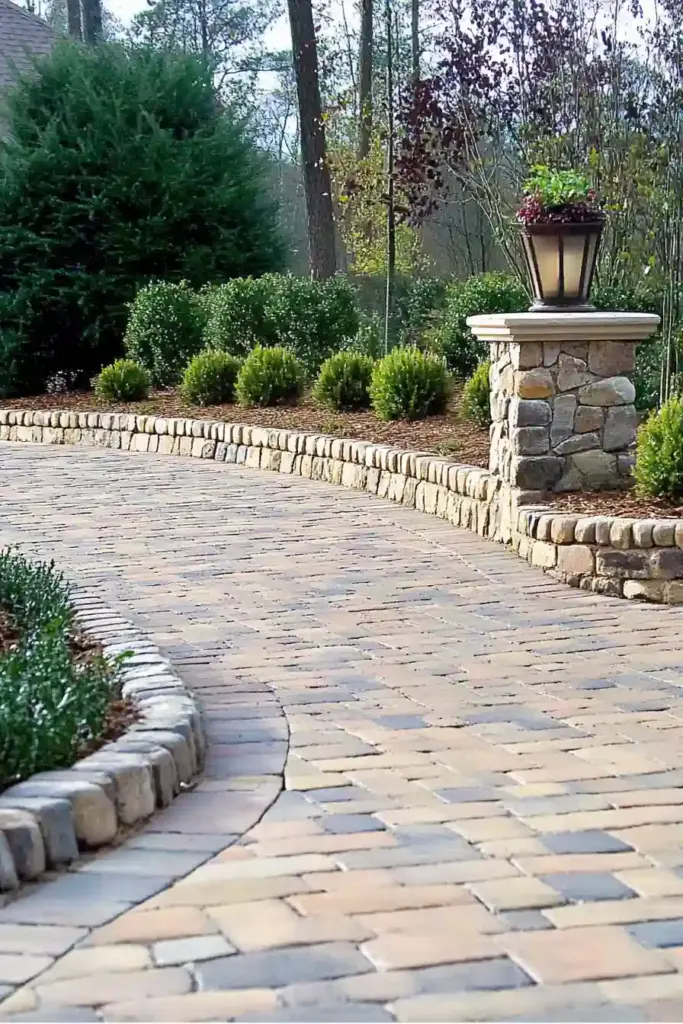
Your driveway may not be the first thing you think of when landscaping—but it’s one of the most visible parts of your property. Adding decorative edging is a low-cost, high-impact way to give it a clean, upscale look.
Budget-Friendly Driveway Edging Ideas:
- Brick or stone borders: Add symmetry and a refined finish
- Recycled pavers or concrete chunks: Eco-friendly and stylish
- Landscape timbers or treated wood: Great for rustic or cottage-style homes
- Gravel strips or decorative turf: Helps with drainage and adds texture
These edging elements don’t just look good—they also help keep grass and mulch in place, reduce erosion, and clearly define boundaries.
Pro Tip: Match your edging material to other elements in your yard, like walkways, patios, or planters, for a coordinated and intentional design.
Style Boost: Add low-voltage pathway lighting along the edge for a touch of elegance and safety at night.
18. 🪑 How to Build a Small Patio Without a Big Budget

Dreaming of an outdoor lounge area where you can relax, entertain, or sip your morning coffee? A small patio is one of the most valuable additions to any yard—and you don’t need a contractor or a big budget to make it happen.
Affordable DIY Patio Materials:
- Concrete pavers or stepping stones (easy to install and rearrange)
- Gravel or crushed stone (great for drainage and modern aesthetics)
- Reclaimed bricks or salvaged concrete for a rustic, eco-conscious feel
Start by marking out your desired area, removing any grass, and laying a weed barrier. Fill with your chosen base material and level it for stability. Add a few inexpensive outdoor chairs, string lights, or a small bistro table, and voilà—you’ve got yourself a cozy backyard retreat.
Why it works:
- Increases your functional outdoor space
- Makes your yard feel “finished” and more luxurious
- Offers a clean setting for planters, fire pits, or container gardens
Pro Tip: Border the patio with potted plants or small shrubs for added privacy and greenery.
19. 📬 Mailbox Landscaping That Makes a Welcoming First Impression
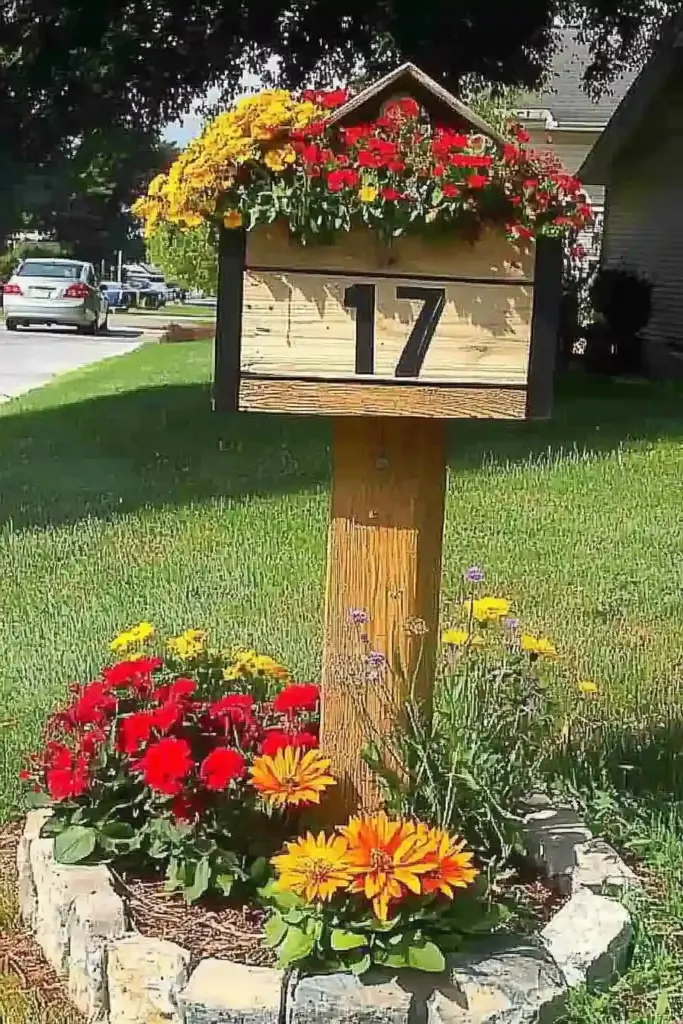
Your mailbox might be small, but it’s one of the first things people see when they visit your home. With just a few simple additions, you can turn this overlooked spot into a charming focal point that looks custom-designed.
Easy Mailbox Makeover Ideas:
- Plant a mini flower bed around the base with colorful annuals or hardy perennials
- Add small shrubs or ornamental grasses for structure and year-round appeal
- Use decorative edging or bricks to create a clean border
- Install a solar-powered post light for evening visibility and style
Style Tip: Paint or stain the mailbox post to match your home’s exterior. You can also add a decorative address plaque or hanging planter for a polished look.
Low-Maintenance Picks: Try salvia, black-eyed Susans, or lavender—they’re drought-tolerant and thrive in sunny spots near the street.
Pro Bonus: Use mulch to reduce weeds and keep the area tidy. A little effort here can make a big difference in your home’s overall curb appeal.
20. 🌿 Boxwood Borders That Define Spaces and Add Elegance
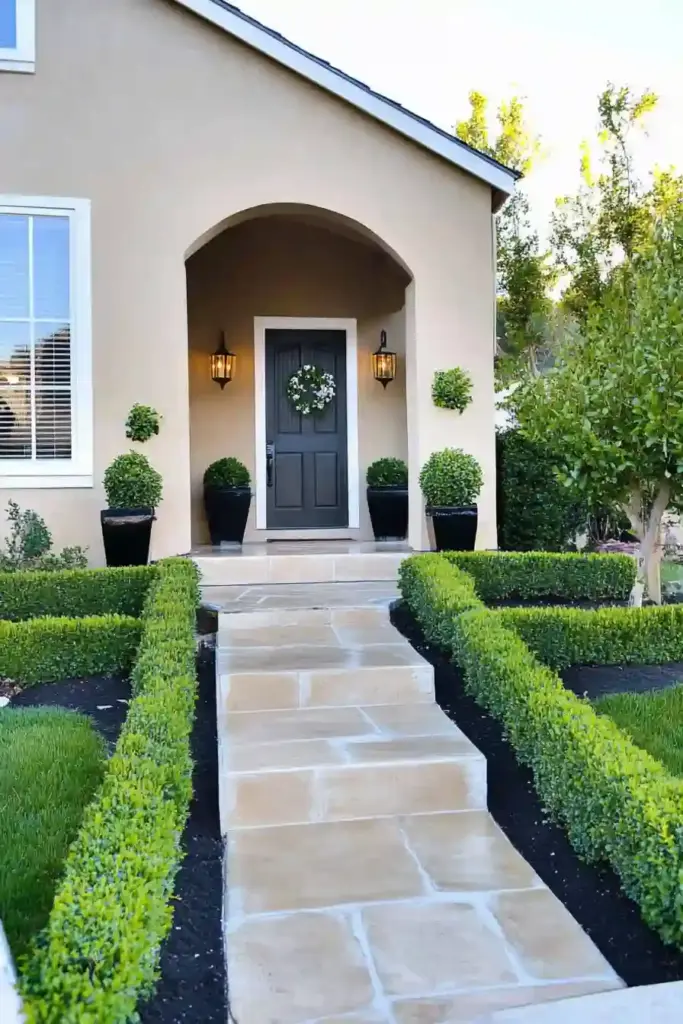
If you’re aiming for that polished, estate-like look on a budget, boxwood borders are a go-to landscaping trick. These dense, evergreen shrubs are perfect for creating clean lines, defining garden spaces, and giving your yard a refined feel—all without a luxury price tag.
Where to Use Boxwood Borders:
- Along walkways or garden paths
- Around flower beds or patios
- To frame your front porch or entryway
- As a living fence to separate outdoor zones
Boxwoods are easy to shape and maintain, making them ideal for formal designs or softer, more natural looks. You can buy them small (and affordable), then let them fill in over time—or score mature ones on clearance at garden centers late in the season.
Why they’re worth it:
- Low maintenance and evergreen (green all year!)
- Adapt well to pruning
- Instantly upgrades the structure and symmetry of your yard
Pro Tip: Alternate boxwoods with flowering perennials for seasonal interest, or add solar path lights between plants for a nighttime glow.
21. 🌳 Tree Garden Edging That Protects Roots and Adds Style
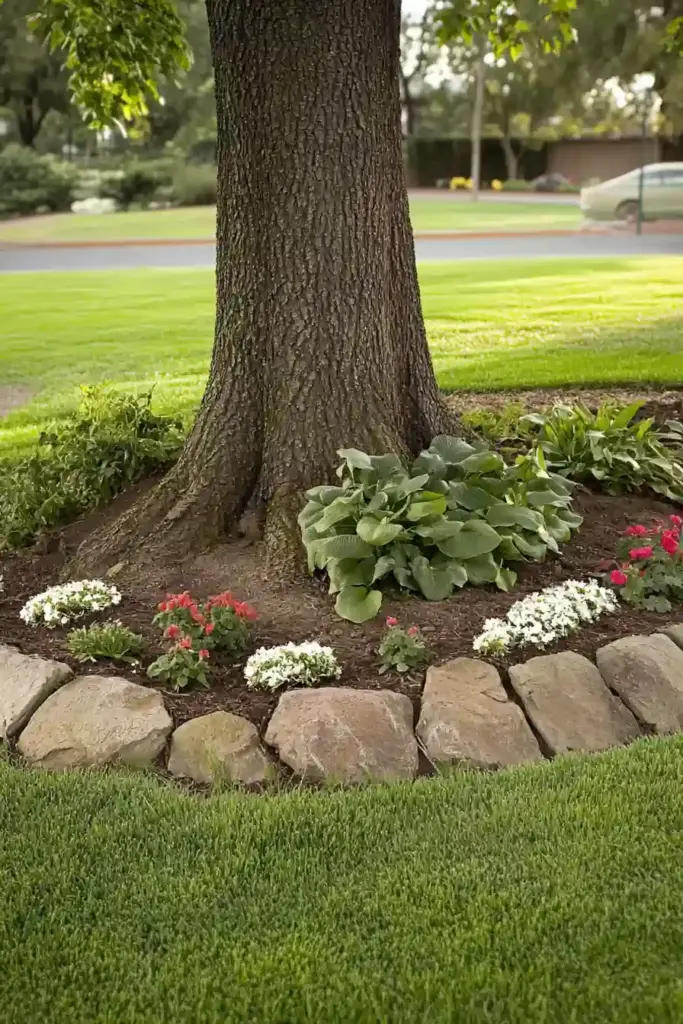
If you’ve got mature trees in your yard, you’ve got a landscaping goldmine. Instead of leaving them surrounded by bare soil or struggling grass, frame them with simple edging to give your yard a polished, cohesive look.
Benefits of Tree Edging:
- Protects roots from foot traffic and lawn equipment
- Reduces soil erosion and helps retain moisture
- Adds definition and a clean visual break in your landscape
Easy and Affordable Edging Materials:
- Bricks, cobblestones, or pavers
- Natural stone for an organic feel
- Recycled rubber edging for eco-friendliness
- Even broken clay pots arranged creatively!
Fill the space within the edging ring with mulch or shade-loving ground covers like hostas, ferns, or liriope to keep it lush and low-maintenance.
Pro Tip: Keep the edging wide enough to accommodate root growth and ensure your design doesn’t smother the tree’s base—leave a gap between mulch and trunk for airflow.
22. 🧵 Fancy Hose Holders That Tidy Up and Dress Up Your Yard
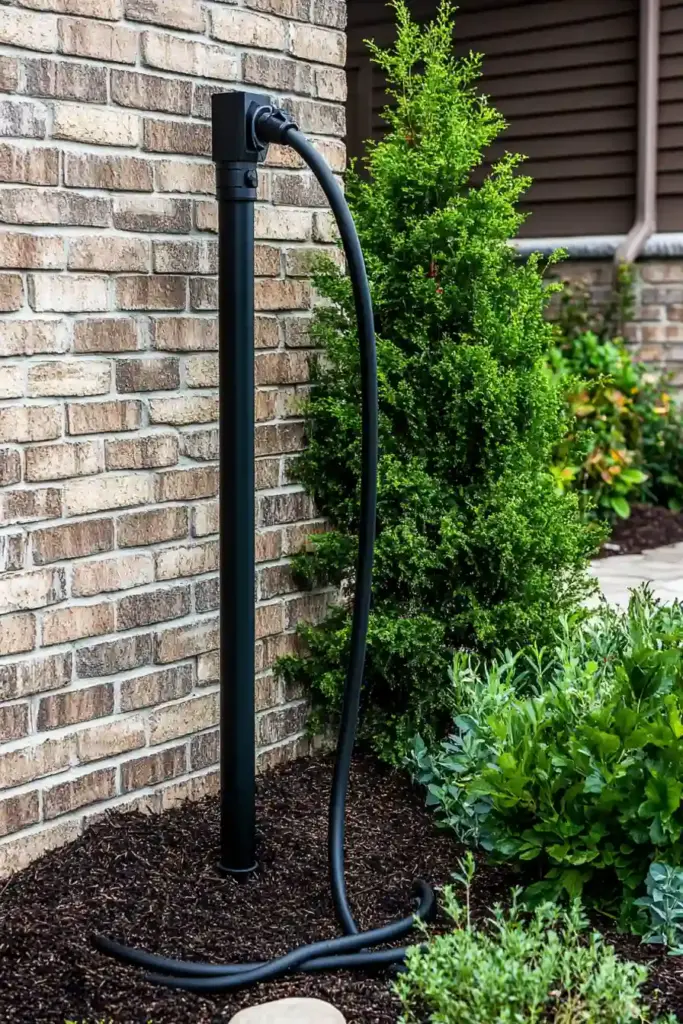
A tangled garden hose draped across the lawn can instantly ruin an otherwise gorgeous yard. The fix? A stylish hose holder that keeps things neat while doubling as a charming decor piece.
Affordable Hose Holder Ideas:
- Wall-mounted iron holders with elegant scrollwork
- Freestanding wooden posts with decorative hooks
- Upcycled baskets or barrels that blend right into your landscape
- DIY from pallet wood or copper piping for a rustic or industrial look
These handy tools not only extend the life of your hose by preventing kinks and tangles—they also give your yard a more intentional, cared-for feel.
Style Tip: Paint or stain your hose holder to match your garden accents (like planter boxes or trellises) for a cohesive aesthetic.
Bonus Feature: Look for holders with built-in planters or storage to maximize function without sacrificing beauty.
23. 💧 Pebble Downspout Paths That Manage Water in Style
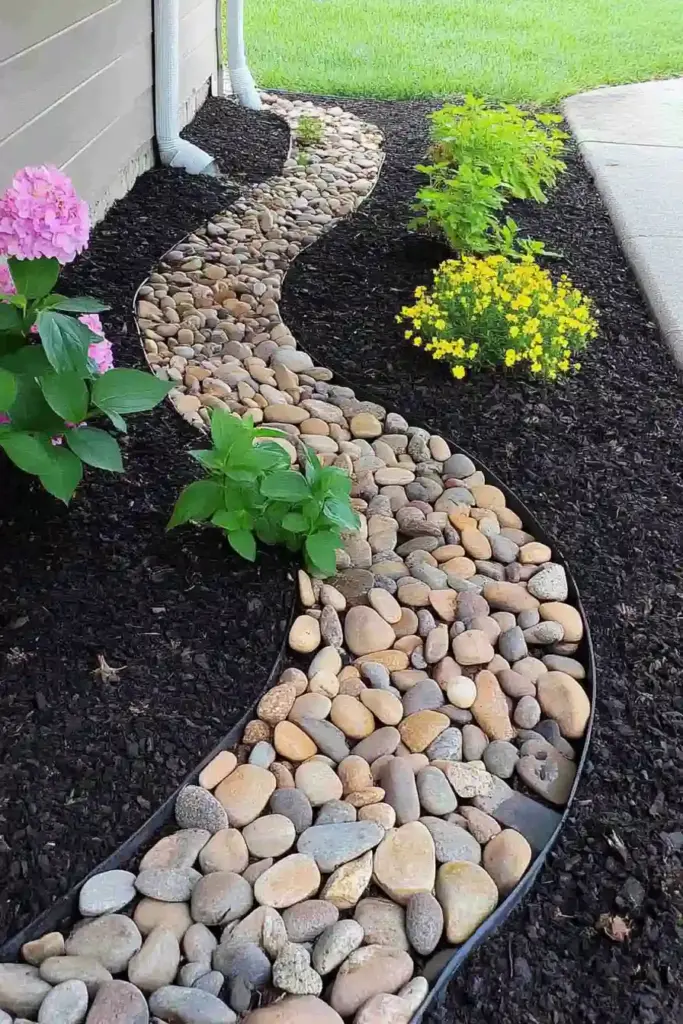
Downspouts are essential for directing rainwater away from your home—but they don’t have to be eyesores. With a few handfuls of decorative stones, you can turn your downspout runoff into a mini water feature that’s both functional and beautiful.
How to Create a Pebble Downspout Path:
- Dig a shallow trench or use a tray along the downspout’s flow line
- Line it with landscape fabric to prevent weeds
- Fill with decorative pebbles, river rocks, or gravel
- Optional: Add a few stepping stones or a solar light for extra flair
Why it works:
- Prevents erosion and puddles
- Helps guide water away from your foundation
- Adds a designer look to your drainage setup
Creative Touch: Add flat rocks or garden statues at the end of the path for a finishing touch that blends into your landscape design.
Pro Tip: Match your pebble color to other materials in your yard—like mulch, walkways, or stone planters—for visual harmony.
24. 🌈 Add a Splash of Color with Easy-Care Croton Plants
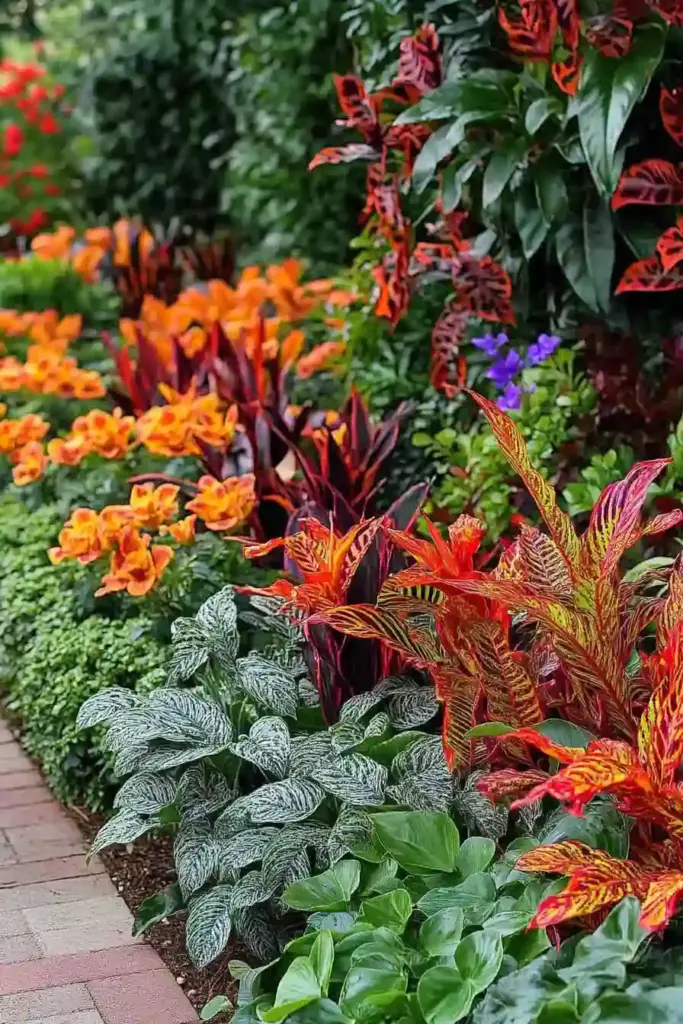
If your yard is craving bold, exotic color, look no further than croton plants. With their striking variegated leaves in fiery reds, oranges, yellows, and greens, crotons bring an instant tropical vibe—and they’re surprisingly easy to care for.
Why Crotons Are a Great Landscaping Choice:
- Extremely vibrant and eye-catching
- Low maintenance and drought-tolerant once established
- Great for containers, borders, or focal points in flower beds
- Adds contrast next to greens, whites, or neutral hardscaping
They thrive in sunny, warm climates, but can also be grown in pots and moved indoors during cooler months if needed.
Design Tip: Pair crotons with solid-color plants like ferns or boxwoods to let their colors truly pop.
Budget Tip: Buy smaller croton plants and let them grow over time—mature plants can get pricey, but young ones are very affordable and fast-growing with the right care.
25. 🌺 The Spilled Flower Pot Trick for a Playful Garden Display
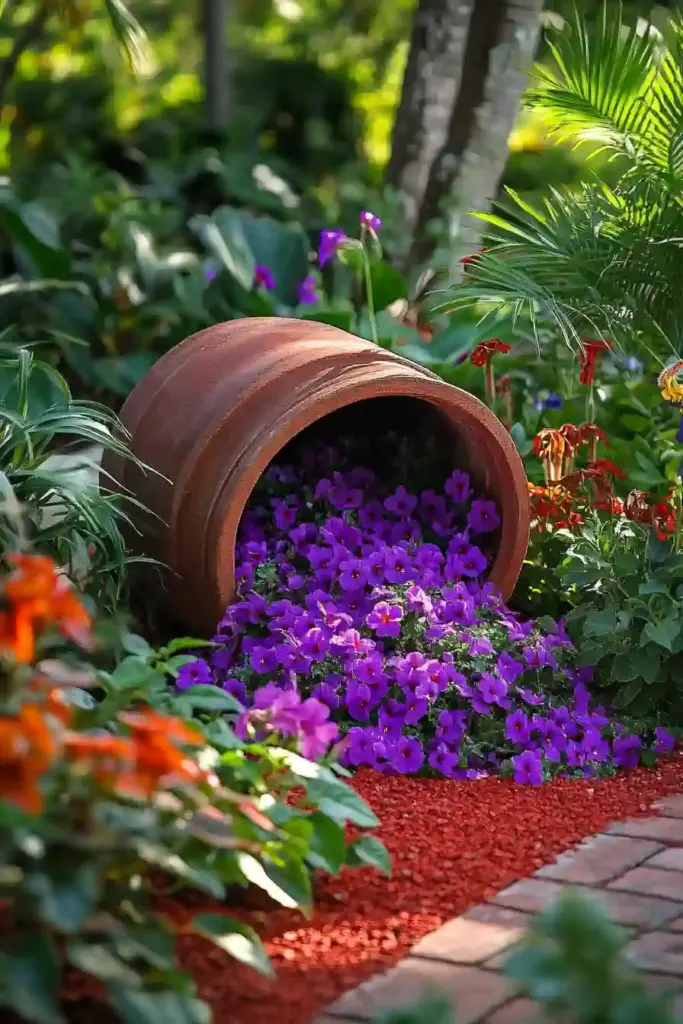
Want to add a unique, eye-catching element to your yard that’s super affordable and full of charm? Try the spilled flower pot display—a clever trick that creates the illusion of flowers pouring out like a waterfall onto your lawn or mulch bed.
How to Create a Spilled Pot Display:
- Partially bury a tilted flower pot on its side in soil or mulch
- Plant low-growing, spreading flowers like petunias, alyssum, or creeping phlox flowing out from the opening
- Optionally add decorative rocks or mini fencing to frame the area
Why it’s a hit:
- Adds personality and whimsy to your garden
- Makes great use of broken or old pots
- Creates a professional “planned” look without a big budget
Design Variations: Use different-sized pots for a cascading effect, or try mixing in succulents or herbs for a functional twist.
Pro Tip: Place your spilled pot near pathways, entry points, or seating areas to catch attention and spark conversation.
🧤 Final Thoughts: Beautiful Landscaping on a Budget
Creating a luxurious-looking landscape doesn’t have to cost a fortune. With a little creativity, elbow grease, and smart planning, these cheap landscaping ideas that look expensive can transform your yard into a show-stopping space that reflects your personality—without draining your wallet.
Focus on layering textures, mixing functional with decorative elements, and choosing plants and materials that offer the most impact for the least investment. With time, even the simplest upgrades can make your outdoor space feel like a million bucks.

