Hydrangeas are among the most stunning and beloved flowering shrubs in home gardens, offering a burst of color from midsummer into fall. Whether you’re growing them in beds, borders, or pots, proper hydrangea care is the key to unlocking their full blooming potential. From soil prep to pruning, this guide will walk you through how to keep these floral showstoppers thriving all season long.
Whether you dream of voluminous blue clusters or dainty pink blossoms, you’re just a few expert tips away from having hydrangeas that are truly the envy of the block.
🌿 Planting Hydrangeas the Right Way
Before your hydrangeas can bloom in all their glory, it’s essential to give them the best start possible. From timing to soil prep, here’s how to set your plants up for long-term success.
🕰️ When to Plant Hydrangeas
The ideal time to plant hydrangeas is during mild weather in spring or fall. These seasons provide the perfect balance—not too hot, not too cold—for young plants to establish roots.
- Spring: Wait until after the final frost and when the soil is soft enough to dig.
- Fall: Make sure to plant early enough for roots to establish before the first frost.
- Avoid summer planting on scorching days, especially if you live in a warmer climate.
🌞 Choosing the Perfect Location
Hydrangeas thrive best in partial shade, especially with morning sun and afternoon shade. Too much direct sunlight, especially during hot afternoons, can scorch leaves and blooms.
Look for a location that:
- Gets 4–6 hours of morning light
- Has good air circulation
- Provides room for the plant to mature
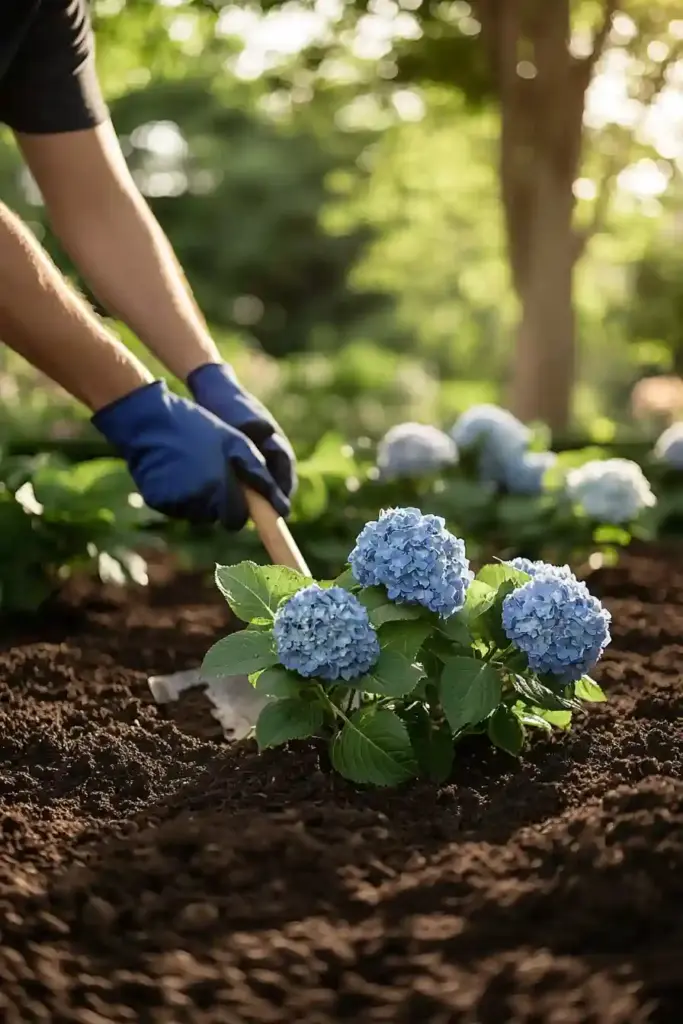
🌱 Soil Prep and Planting Tips
Hydrangeas love loamy, well-draining soil that holds moisture without becoming waterlogged.
Here’s a simple planting process:
- Dig a hole slightly wider and deeper than the pot your hydrangea came in.
- Loosen the root ball gently with your fingers to encourage root spread.
- Add a bit of high-phosphorus fertilizer (like bone meal) to the hole to support bloom development.
- Place the plant in the hole with the crown level with the ground.
- Backfill with soil, gently pressing down to remove air pockets.
- Water thoroughly after planting.
💡 Pro Tip: Add compost or organic material to sandy soil to improve moisture retention, or mix in gypsum if your soil is clay-heavy to improve drainage.
🌸 Container Planting Tips
Growing hydrangeas in pots? You’ll still need to prioritize drainage and space.
- Use containers with drainage holes to prevent root rot.
- Choose a large enough pot—the bigger the container, the less frequent the watering.
- Fill with bagged potting mix, not garden soil, which can be too heavy.
- Leave about 1 inch of space at the top to prevent overflow during watering.
Mix in companion flowers or foliage for added color and texture—but make sure all plants in the pot have similar light and water needs.
💧 Daily Hydrangea Care Essentials

Once your hydrangeas are in the ground (or a pot), consistent care will keep those blooms bold and beautiful. Here’s what you need to know about light, water, soil, and feeding your plants the right way.
🌤️ Light: Finding the Sweet Spot
Hydrangeas prefer a balance between sun and shade. The key is morning sunlight followed by afternoon protection—especially in warmer climates.
- Ideal light: 4–6 hours of gentle morning sun
- Too much direct sun? You’ll notice wilting or scorched leaves
- Too much shade? You may get lush leaves but few blooms
For Southern gardeners, choose spots with filtered sunlight to reduce stress during hot afternoons.
💦 Watering: Deep and Regular
Hydrangeas love moisture—but not soggy soil. The goal is deep watering 1–2 times per week, depending on your climate and soil type.
- Water deeply so the roots absorb the moisture.
- In the first season, water consistently to establish strong roots.
- During hot, dry periods, increase frequency (every other day if needed).
- Use mulch to retain moisture and reduce evaporation.
💡 Check soil moisture by sticking your finger into the soil. If the top inch feels dry, it’s time to water.
🌾 Soil Maintenance: Drainage Matters
Hydrangeas aren’t too picky—but the right soil makes a big difference.
- Aim for loamy, well-draining soil.
- Sandy soil? Add compost to retain nutrients.
- Clay soil? Mix in gypsum or coarse sand to improve drainage.
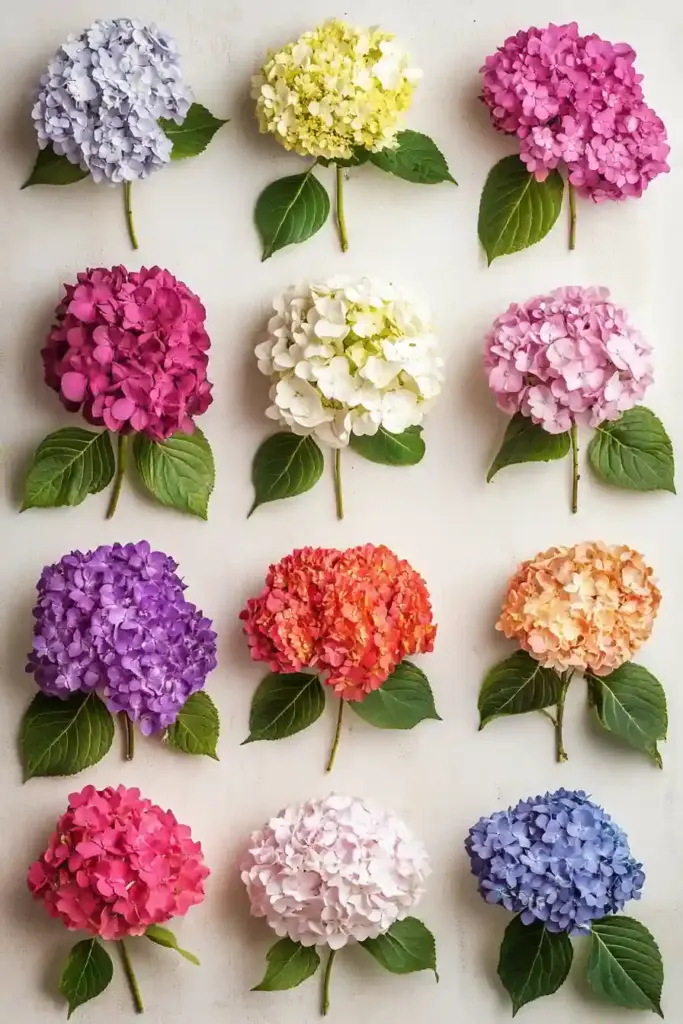
Hydrangea bloom color can even change depending on your soil’s pH level:
- Acidic soil (pH < 6): Blue blooms
- Neutral to alkaline soil (pH > 7): Pink blooms
Pick up a soil test kit from your local garden center to measure and adjust your pH. Use aluminum sulfate for blue flowers or dolomitic lime to shift blooms pink.
🌼 Fertilizing: Boost Those Blooms
Hydrangeas don’t require heavy feeding, but a little help can go a long way.
- Use a balanced 10-10-10 fertilizer for general health and blooms.
- Apply in early spring, just as new leaves start to appear.
- Spread fertilizer around the plant’s drip line—the widest reach of the branches.
🛑 Avoid over-fertilizing, which can lead to leafy growth and fewer blooms.
✂️ How to Prune and Deadhead for Maximum Blooms

Hydrangeas don’t demand constant trimming, but knowing when and how to prune and deadhead can mean the difference between a wild tangle and a stunning showpiece. The key is understanding your plant’s variety and growth cycle.
🌿 Pruning Basics: Know Your Type
Pruning needs vary by hydrangea species. Before you grab those shears, identify whether your plant blooms on old wood (last year’s growth) or new wood (current season’s growth).
| Hydrangea Type | Blooms On | Prune |
|---|---|---|
| Bigleaf (H. macrophylla) | Old wood | After flowering (late summer) |
| Oakleaf (H. quercifolia) | Old wood | After flowering |
| Panicle (H. paniculata) | New wood | Late winter or early spring |
| Smooth (H. arborescens) | New wood | Early spring |
🧤 How to Prune Hydrangeas (Step-by-Step)
- Sanitize tools to prevent disease spread.
- Remove dead or damaged stems anytime during the season.
- For old-wood bloomers:
- Cut back immediately after flowering
- Avoid pruning in fall or winter (you’ll remove next year’s buds)
- For new-wood bloomers:
- Prune in early spring before new growth appears
- You can shape or cut back as far as desired—they’ll bloom again!
✨ Pro Tip: Look for plump buds on stems. Always cut just above a healthy bud, angling your shears away to prevent water collection.
🌸 Deadheading: Clean Blooms, Not Pruning
Deadheading is the simple act of removing spent flowers—not to be confused with pruning.
- Use clean shears to snip off faded blooms just above a set of leaves.
- Helps redirect energy into root and leaf growth
- Not essential but improves appearance and encourages reblooming (especially for panicle and smooth types)
🚫 Don’t overdo it on bigleaf and oakleaf hydrangeas—light deadheading is best.
🛡️ Overwintering Hydrangeas: Protecting Them from the Cold

While hydrangeas are generally hardy, winter weather can be tough—especially for young plants or those in pots. Taking the right precautions can prevent damage and ensure your shrubs come back strong next spring.
🌨️ Mulch and Insulate for In-Ground Plants
Cold temperatures and drying winds can damage tender buds and roots, so insulation is key.
- Add a thick layer of mulch (6–8 inches) around the base of the plant.
- Use organic materials like pine straw, leaves, or bark chips.
- Apply mulch in late fall, once the ground begins to cool.
- For younger plants, consider placing a cage or chicken wire ring around the base and filling it with mulch or leaves for extra protection.
🐇 Bonus: A cage also keeps rabbits and rodents from snacking on stems during winter.
🪴 Caring for Potted Hydrangeas
Container-grown hydrangeas are more vulnerable to cold because their roots aren’t insulated by the ground. When temps dip below freezing:
- Move pots into an unheated garage, basement, or shed to prevent freezing.
- If indoor storage isn’t an option, wrap pots in burlap or bubble wrap, then group them together for warmth.
- Continue to water sparingly—just enough to prevent the soil from drying out completely.
💡 Tip: Don’t bring pots into heated areas (like inside your home). Hydrangeas need to go dormant in winter.
🧊 What About Snow?
Snow actually acts as a natural insulator, so if your plants get buried, don’t panic. Just make sure stems are protected before the first heavy snow hits.
🌼 Understanding Hydrangea Types

Not all hydrangeas are created equal. From snowball-like clusters to cone-shaped panicles, understanding the different hydrangea types helps you give the right care—and maybe even choose your next favorite variety.
💠 Smooth Hydrangeas (Hydrangea arborescens)
These classic beauties are known for their big, white, snowball-shaped blooms. They’re low-maintenance, bloom on new wood, and are very cold-hardy.
- Zones: 4–9
- Size: 3 to 5 feet tall and wide
- Bloom Time: Mid to late summer
- Color Note: pH does not affect bloom color
- Care Tip: Cut back in early spring for a fuller plant
Popular cultivar: ‘Annabelle’
🔻 Panicle Hydrangeas (Hydrangea paniculata)
These hydrangeas have unique cone-shaped blooms that start white, then age into pink or red as temperatures cool. They’re the easiest hydrangeas to grow and tolerate full sun better than others.
- Zones: 3–8
- Size: Up to 10 feet tall and wide
- Bloom Time: Early summer through fall
- Color Note: Color doesn’t depend on soil pH
- Care Tip: Prune in late winter or early spring to shape
Popular varieties: ‘Limelight,’ ‘Vanilla Strawberry,’ ‘Quick Fire’
🍁 Oakleaf Hydrangeas (Hydrangea quercifolia)
Named for their distinctive lobed leaves, oakleaf hydrangeas offer four seasons of interest—with fall foliage in deep reds and oranges and peeling bark in winter.
- Zones: 5–9
- Size: Up to 8 feet tall and wide
- Bloom Time: Early to mid-summer
- Color Note: pH does not affect flower color
- Care Tip: Prune only if needed, immediately after blooming
They’re native to the southeastern U.S., making them great for woodland gardens.
🌸 Bigleaf Hydrangeas (Hydrangea macrophylla)
These are the classic hydrangeas most gardeners picture—large, round mophead blooms or flatter lacecaps in vivid pinks, purples, and blues.
- Zones: 5–9
- Size: 3 to 6 feet tall and wide
- Bloom Time: Early summer
- Color Note:pH-sensitive
- Acidic soil = Blue flowers
- Alkaline soil = Pink flowers
- Care Tip: Protect buds in winter and avoid heavy pruning
Popular series: Endless Summer®
🌈 Want to change your bloom color? Use aluminum sulfate for blue or lime for pink—just test your soil pH first!
🐛 Common Hydrangea Problems and How to Fix Them
Even though many modern hydrangea varieties are bred to be disease-resistant, they’re not completely immune. Here are the most common issues, how to spot them, and what you can do to keep your plants healthy.
🍃 Fungal Diseases
Cercospora Leaf Spot
A fungal disease that causes wet-looking dark spots on leaves—especially in humid or wet climates.
- Signs: Brown/purple spots on leaves, especially lower ones
- Prevention:
- Water at the base, not overhead
- Prune for better airflow
- Treatment: Apply a fungicide if the problem persists
Powdery Mildew
Looks like a white powder dusted across leaves, usually in shady, crowded areas.
- Signs: White coating on leaves, yellowing, leaf drop
- Prevention:
- Ensure proper spacing and light
- Improve air circulation
- Treatment: Remove affected leaves, treat with fungicide if needed
🕷️ Insect Pests
Spider Mites
Tiny sap-suckers that weave webs and leave your leaves looking speckled and dull.
- Signs: Fine webbing, tiny holes, stippling on leaves
- Fix:
- Spray with water to knock them off
- Use insecticidal soap or neem oil
Aphids
Small, soft-bodied insects that cluster on stems and leaf undersides.
- Signs: Sticky residue, yellowing, curled leaves
- Fix:
- Blast with water
- Treat with neem oil or insecticidal soap
Beetles (Japanese & Rose Chafer)
These pests chew through flowers and leaves, often leaving only veins behind.
- Signs: Skeletonized leaves, chewed blooms
- Fix:
- Hand-pick beetles early in the day
- Soak leaves in soapy water to kill eggs
- Use Neem oil as a preventive spray
💡 Natural Predators Help: Ladybugs, lacewings, and birds all eat pest insects. Avoid overusing insecticides that harm the good guys.
💐 Hydrangea Bouquets: From Garden to Vase
Hydrangeas aren’t just showstoppers in the yard—they also make gorgeous cut flowers that can last for up to two weeks indoors with the right care. Whether you’re clipping from your own garden or picking up a store-bought bouquet, here’s how to keep those blooms looking fresh and fabulous.
✂️ Cutting Garden Hydrangeas
For best results, cut blooms when they’re fully mature, usually late in the morning when the plant is hydrated but not damp from overnight dew.
- Use clean, sharp shears or a floral knife
- Cut stems at a 45-degree angle
- Immediately place them in a bucket of lukewarm water to prevent wilting
💡 Fully bloomed hydrangeas feel slightly papery to the touch—these are ideal for arrangements and longer vase life.
🌿 Prep Your Stems for Vase Life
Hydrangea stems produce a sap that can block water uptake. Here are two ways to prep:
- Dip in Alum Powder: After cutting, dip the end of each stem into alum (available in the spice aisle) before placing in the vase.
- Boil Water Trick: Dip the bottom inch of the stem in boiling water for 10 seconds to clear blockages.
Also:
- Remove lower leaves to prevent rot in the water
- Use cool water in the vase and refresh every 2–3 days
- Give stems a fresh trim every time you change the water
🌷 Arranging Your Hydrangeas
You can go all-hydrangea for a bold look or pair them with other blooms like:
- Roses
- Dahlias
- Freesia
- Greenery like lemon leaf or pittosporum
Use vases with wide bases and narrow necks to support heavy flower heads, or let hydrangeas form a “grid” that holds up other stems in a mixed bouquet.
🔁 Reviving Wilted Blooms
If your hydrangeas start to look limp:
- Submerge the entire flower head in cool water for 30–45 minutes.
- Shake gently, retrim the stem, and return it to fresh water with a bit of sugar or floral preservative.
🌞 Keep arrangements out of direct sunlight and away from drafts or fruit bowls (which emit ethylene gas and shorten bloom life).
❓ FAQs About Hydrangea Care
🔄 Should I prune my hydrangeas every year?
It depends on the variety.
- Panicle and smooth hydrangeas benefit from annual pruning in late winter or early spring to encourage full blooms.
- Bigleaf and oakleaf hydrangeas bloom on old wood, so prune only after flowering—and sparingly—to avoid removing next year’s buds.
🌸 Why aren’t my hydrangeas blooming?
There are a few possible culprits:
- Improper pruning—cutting back old-wood bloomers at the wrong time removes buds.
- Too much shade—not enough light will limit flowering.
- Harsh winter weather—bud damage can prevent blooms in spring.
- Over-fertilizing—encourages leafy growth instead of flowers.
✅ Try a low-nitrogen fertilizer and reassess light exposure if your hydrangeas are leafy but bloomless.
🌈 Can I really change the color of my hydrangeas?
Yes—but only bigleaf hydrangeas (Hydrangea macrophylla) are affected by soil pH.
- To get blue flowers, make soil more acidic (pH below 6.0) using aluminum sulfate.
- For pink blooms, raise soil pH above 7.0 using dolomitic lime.
- Test your soil with a pH kit and adjust slowly—changes take time!
🪴 Can I grow hydrangeas in pots long-term?
Absolutely! Just be sure to:
- Use large containers with good drainage
- Refresh the soil every 1–2 years
- Move pots into protected areas or insulate them during winter if you live in a cold zone
Bonus: Container-grown hydrangeas are easier to move if you want to experiment with sun/shade placement.
🌿 Final Thoughts on Growing Healthy Hydrangeas
Hydrangeas may look delicate, but with the right care, they’re surprisingly resilient and incredibly rewarding. Whether you’re planting them in garden beds, containers, or bringing them indoors in a bouquet, these versatile shrubs offer stunning color, lush texture, and a timeless charm.
Remember the basics:
- Choose the right variety for your climate
- Provide well-draining soil and partial sunlight
- Water deeply and consistently
- Prune and deadhead with care
- Protect plants during the winter, especially young ones and container-grown varieties
With just a little planning and attention, your hydrangeas will deliver show-stopping blooms season after season. So grab your gardening gloves—your dream hydrangea garden is just a few steps away!


